Introduction to Bio-Activity:
As of recent times, a lot of folks have been asking questions, and for guides on Bio-active Enclosures. How to set them up, how to drain them, how they work, why they work. I figured it was good and Time, that someone sat down and made a Guide! I have been meaning to do so for Years, but never found the time, until now! In this guide we will try and cover all of those aspects, in some detail.
This is the first of a Series, of Articles. meant to be an introduction to Bio-Active Vivaria, we will cover all aspects in further detail in each article of the series!
Bio-Activity, What is it?:

The real term "Bio-active" has a different meaning than what we use it for, sort of. However in our use case a Bio-active Enclosure is a 100% self sustaining ecosystem. This means, it uses all of the components with in the enclosure as it would in nature. It is in direct contrast to the typical aim for Captive keepers of Herps, and especially Chameleons.
Instead of fighting natural processes, eliminating bacteria, removing feces and urates, cleaning mold, ect we allow these things to flourish, and remain. By doing so, we allow the our Artificial Ecosystem to operate as it would in Nature. We encourage the growth of Fungi, Bacteria, Molds, ect, as in return, they provide our other lifeforms, which turn these into positive outputs, such as nutrients for our plants.
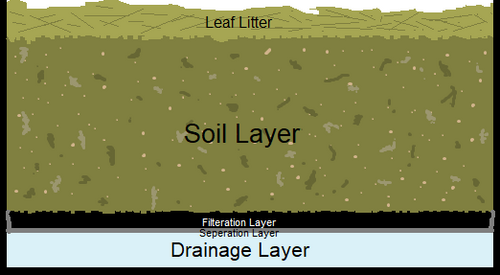
A Bio-Active "Soil" is composed of many different layers, each serving an important function, to create this "Eco System" for the most part, these same Layers, or similar ones exist in Nature as well, and they are a crucial part to making everything work. You can see a Summary of the Layers, on the Left, but we will go more in detail about them, why we need them, and what they should be composed of.
Bio-Activity, Benefits:
Arguably the largest Benefit to Bio-Activity, is it is a more natural way to keep our reptiles. The ecosystem created, mimics more closely a natural habitat, which a lot of keepers feel as a positive. However there is a few more benefits that we will go over, some proven, some not.
Plant Health:

A common saying around here, for Traditional Keeping, is to use Fertilizer free soils, and to never introduce Fertilizers to the Plants or the caging. This is a short sighted approach, it makes sense I guess, for the Animals, however the plants need nutrients, that is what Fertilizers are, nutrition for the plants. You will never get the healthiest, strongest, plants without providing them nutrition. Bio-Activity provides this in a way more akin to the way they would receive it in nature.
Cleaning, or lack there of!:
Bio-active Vivaria, does not need to be cleaned! This is always a Favorite, by many keepers looking into Bio-Activity. As stated, we are in direct contrast from traditional keeping. We want Molds, Bacteria, and Fungi. Our Lifeforms, use these to create positive nutrients, because we are not having to remove bad bacteria, we also get to leave the good bacteria. Providing even more benefits.
Immune System Boosting:

The best way to boost your immune system, is to use your immune system. Think of the Immune system like a muscle, the more you work out, the stronger that muscle is. In a traditional keeping plan, Cage Cleanings are frequent, we are removing pathogens, that could cause issue. By doing so, we are removing our animals exposure, thus their immune system no longer needs to fight off pathogens. The result of this, is a weaker, untrained immune system that leaves the animal vulnerable, when the immune system is needed.
Bio-Activity, Disadvantages:
I do not find it fair, to provide all the Advantages, without discussing some of the downsides or issues. So here we go!
Cleaning, Or lack there of ability!:

That is right, one of the largest pros, is also a major con. If a situation ever comes about where a serious pathogen, or something like a Parasite was introduced. Its not as easy to rectify the issue. In the case of a serious pathogen or parasite, pretty much everything has to go. Depending on the severity of the situation, this means at minimum, your Bio-active layers, and everything in it (including the Lifeforms). At most, depending on how you did your cage (walls, plants that are mounted, ect) these may also have to be thrown away. This can be a substantially expensive issue in some vivaria. To give an example, my Large Bio-active, has Cork Tile walls, across all the 4x2x4 area, the total price for that cork tile, over 300 dollars. If there was a parasite issue, that is a 300 dollar loss, in cork alone.
Pests:

Pests are a large issue with Bio-active. Extreme care must be taken with adding plants from home stores ect. Its one thing to yank a potted plant with a mealy bug infestation from a more traditional Cage setup. Its an even more difficult situation to remove said pest from Bio-active Vivaria. Same as the cleaning about, its imperative that harsh chemicals and pesticides are not used in your vivaria for both the sake of your Chameleon, but also your Micro-fuana. This makes dealing with plant pests, miles more difficult. The usual Bio-Active route, is to use Predatory insects, that will predate on your pest, this can get expensive, cause other issues, and doesn't always work. On top of the fact that a Bio-active Vivaria, is more attractive to pests, like Ants, and the introduction of Leaf Litters, and Botanicals.
Cycle Time:

Cycle time, is a short term disadvantage but a disadvantage all the same. When first setting up a Bio-Active Vivaria, your going to need to allow Cycle Time. What this means is upon intial setup, your layers are complete Walls (if you do them) are done, Micro-fauna is added, Plants are added, and you begin to water your Bio-active vivaria. Your going to have the "Mold Stage", you added all sorts of life, and the ability for life to form, and have essentially created a "Big Bang". Life forms, both beneficial and not beneficial are going to pop up like crazy. Whether the are spores from the air, were in the soil, were with your Fuana, or whatever.
For the first few weeks, the new single source organisms, are going to take over. Mold is going to be everywhere, growing where it can, and trying to take over. In time, the Micro-fauna will begin to do its job, it will take back the landscape, and balance the ecosystem, however you have to allow time for this process to work. This is known as "Cycle Time" ideally any new Bio-active Vivaria, should allow 1 month for this cycle to complete, before introducing an animal.
Bio-Active Vivaria, Whats Involved:
Now we will get into the fun Part! Your sold, you want to have a Bio-active Vivaria. What do you need to Accomplish this, how much will it cost, how do you set it up, what do you need to look out for. We will go over all of that now. We will take a quick look, at each "Layer" of the Bio-active Vivaria, and go further in depth on each in later Blog Articles.
Cost:

I wanted to go over this first, as it is another common question that comes up. Its is also a deterrent, for folks that think it will cost a lot.
It can cost a lot, or it can cost almost nothing, if not nothing at all. The cost depends heavily, on what you have around, what you want to accomplish, and how much ingenuity you use. The amount of money required, A lot to nothing, is completely based on your decisions, so dont let a low budget Deter you from going Bio-active. I dont want to go too much in depth, with any one aspect with this Intro, so I will touch on a few options you can buy, and a cheap/free option.
Soil Bin:

The soil bin, is the first and pretty much most important part of the Bio-Active Vivaria. This is the bin we will use to hold are Bio-Active Layers. If your using a Glass Vivarium, odds are you already have this built into to the Vivarium. However if your using a screen cage, or DIY cage, your going to have to figure out a way to hold your soil layers. All you need, is some type of bin, or bucket, or box, that is waterproof, can retain water, and is high enough to support the layers, and preferably the same size as the enclosure.
We will go later in depth in how to, of a few different builds of Soil Bins for Screen cages, and a way to seal it in a DIY cage, in a later article. For now, there is commercial options available, from Dragonstrand, or you could use Pet Trays, Bus Trays, it really depends on the size of your cage, so its hard to give recommendations. However Dragonstrand makes them for their own cages, and Reptibreeze, so screen users can look there.
Layer 1 - The Drainage Layer (1 - 2"):
The very bottom most layer, and our first layer is the Drainage Layer. The intention of this layer, is provide a place for excess water to go, ideally in a perfect system, there will be very little if any water in this area. This is more of an insurance policy, a just in case situation. You can add a Drain to your soil bin, in which case your drainage layer, will always be drained, or drain-able on demand. You can also add a small pipe, like PVC, in a corner of the Vivaria, that is as high as all the layers, and reaches into the drainage layer, if you need to siphon out excess water. There is a few media, that you can use to create the drainage layer. We will go over a few.
Egg-crate Light Diffuser:

My personal favorite is Egg Crate Light Diffuser. It is a material, that is made up of crossing piecing forming squares, of lightweight plastic. It has the benefit of being a very light Drainage layer, and also holding the most water in the Drainage layer, as it takes up low surface area. To create a drainage layer from this material, you will build a box, from the pieces with Zip Ties. Or cut a piece the size of your soil bin, and use some other material to build "feet" to raise the material, an inch or two off the bottom.
This material can be purchased at pretty much any home store, Menards, Home Depot, Lowes, usually in 2x4ft panels (so you can do a few vivs). Its usually white only at the various home stores, however online sources do provide it in other colors, if your using a glass tank and would like a diffrent color of drainage layer, as it will be visible.
Hydroton/Lecca/Lava Rock:

These 3 materials, are Rock like structures. Some of them are Round balls, others (Lava rock) are more uniquely shaped. The idea, here is similar to the Light Diffuser, we want to lay them out, an inch or 2 high. These materials are very porous so they allow water to flow into them, and thus hold large amounts water. However, in large cages, with deep layer, the weight can be quite high. You could use rocks from outside and save some Coin, however unless they are very porous rocks, they will not hold as much water, and will weigh more. We will go more in detail, with all these later, in another article, of course.
Can be sourced, from Home Stores, or anywhere that sells gardening supplies usually. For the likes of Lavarock, you may be able to find some locally outdoors however do not take without permission if its not a natural occurring source.
Layer 2 - The Separation Layer:

The next layer, is the separation layer. All this layer does, is separate the Drainage Layer from the Layers above. There is really only 2 good options for this layer, there is a few others, with niche use cases that we will go over in the Drainage layer Article later. For now, we will only discuss the 2. The best 2 choices for this layer, is Fiberglass Window Screen, and Weed Control Fabric. You can use one, or you can use both. If you are to use Weed block fabric, I would advise using screen first, to provide more strength so the weed fabric doesn't rip.
You have to be careful with the purchase of Weed Block, as there is a few different types. One is a Plastic black sheeting, sometimes with holes sometimes not, you do not want this. You want the weed block that allows water to freely pass through it. It will be kind of see through, like sheer clothing, when held to the light.
When cutting out your Separation layer, you want it to be a few inches bigger, on all sides than your Soil bin. This way when put it in, you can run some up the sides of the bin, to make sure the soil does not fall into the drainage layer on the sides.
Layer 3 - The Filtration Layer (1/4 - 1"):


This layer is Completely optional, and not really needed in our use case. It is more so for closed Bio-Active terrariums where the water is recycled, in the closed container. Though you can still add it, if you want to, so I added it. This layer is very simple, it is simple Charcoal, just a nice layer of charcoal. 1/2", 1", or even more, all this layer does is filter out contaminants of water that falls through the basin. If your soil bin has a drain, and you want to save the drainage water for some reuse, then you will want this layer. The type of charcoal that is usable is either "Lump Hardwood Charcoal" or "Horticulture Charcoal" not not just use Barbecue charcoal briquettes. If you have a smoker, where you burn hardwood, that charcoal would also work however. I have never tried it, but have heard that Aquarium Filter Media, could maybe would also work.
Layer 4 - The Soil Layer (3+"): Now we have reached the meat and potatoes, this is what everyone came for we know it! There is way to much information to go over, with soil to even scratch the surface in this article. So we will go over, what we need main component wise, loosely, and will have a Article later, on Soils. I will also recommend a few decent commercial soils I have experience with. As we go over the various aspects that make a good soil, and why, we will add "Parts", this will in turn read as a recipe to a basic soil mix, you can DIY yourself.

Soil Base (1 Part):
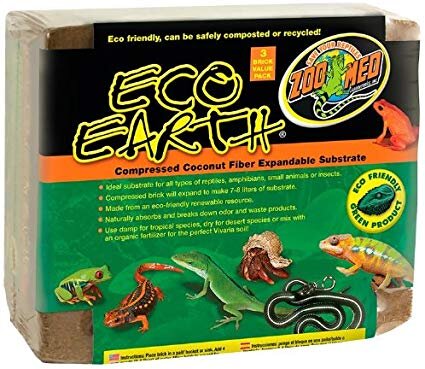
For our soil base, you can use a few different products, Cococoir in a powder Form (Eco Earth) is a great one, and my personal favorite. Its the longest lasting and has decent moisture retention. However some other options that you could use, are Dirt (from a clean pesticide free area), Potting Soil (Top Soil), or Peat Moss. I personally do not like Peat Moss, as it breaks down fast and is not a sustainable resource, a lot of Gardening groups, would like to see it banned from use.
Coarse Additive (1 Part):

For our Course additive, you can use anything from "Fine Bark" small pieces of Bark, Orchid Bark, Reptibark, ect, (make sure it is not dyed). To Twigs and Sticks, from Hardwood trees, broken into small pieces, or Tern Fern Twigs, ect. You can use either, or you can mix both for better contrast.
There is also Mineral based options for this aspect. You can use things like Perlite, Lava Rocks (medium to large), Hydroton, Broken Pieces of Clay pots, Grow Stones, ect. The point of this additive, is to provide, aeration holes in the soil, help it drain better, and keep the soil from compacting. You can use just bark additives (most common) or you can mix bark with stones, or use just stones. Its really up to you!
Moisture Additive (1 to 2 Parts):
This addition will be a moss product, that will aid the soils ability to retain moisture. We want our soil to hold good moisture for the plants, but we do not want it to retain too much moisture either. For a lot of tropical species, like Dart Frogs, many suggest 2 parts of this additive, for Chameleons, I lean to 1 - 1 1/2 parts. We mist, a lot so moisture will be added in much more than many other tropical vivariums, so a better draining soil is paramount here. Also you can always add more, you cant really remove it however. The best and easiest option for this, is Sphagnum Moss, other types of dried moss work, but Sphagnum is easy to source and works well. I like to use Long Fiber Sphagnum, and cut or rip it up to smaller chunks.
Sand Additive (1 Part):

Sand additive, is to add some more Coarseness to the soil, and improve drainage. It also helps the soil hold shape and tunnels better, especially important for females as a lay bin. You can use any type of sand or rock for this, such as Play Sand, Reptile Sand, Horticultural Sand (larger granules) or things like crushed up "Grow Stone" or Lava Rocks. Basically we are just trying to add some grit, which will allow the soil to retain structure and improve drainage. There is tons of options, too much to talk about here, so stay tuned for the soil article, where we will dive more in depth with different types of sand, and rock, and how they affect the soil, and the PH.
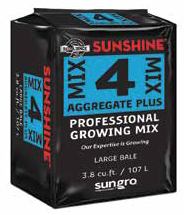
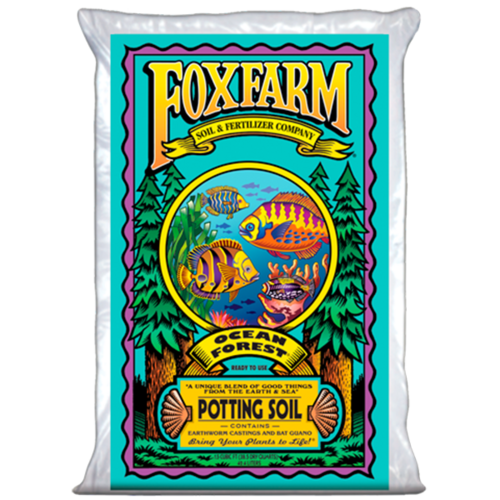
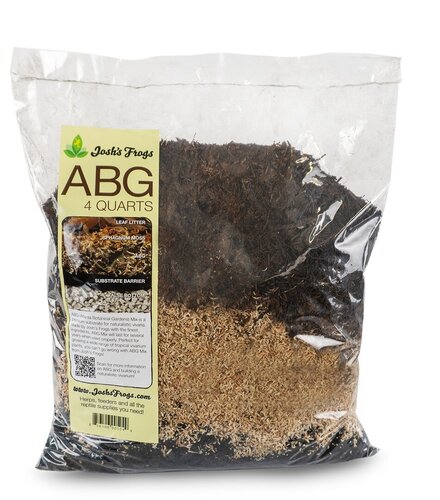
Commercial Offerings: There is a plethora, of good commercial offerings on the market, a few I have tried and a ton I have not. I will just name a few easy to find options that I have experience with, to give you a good starting point, and a few proven options.
Layer 5 - Leaf Litter (1-2"):
This is likely the easiest layer, its simple as it says, Leaves, littering the top of the substrate. You can use pretty much any leaf you want, some will deteriorate faster than others however. I like to use Hardwood leaves as my Leaf litter base, such as Oak, Magnolia, Willow, Maple ect. I then use, and allow the dead leaves from my plants to drop on top, and add to the contrast. You can buy your leaf litter, or you can go find it yourself, from areas that are Pesticide free. There is a large debate among bio folks, whether these leaves should be sterilized, we will save that for another article.
If you want to sterilize them, there is 2 options I will bring up. Baking them at 250 degrees, for 30 mins will get this done, however it also makes them more brittle and they will deteriorate faster. The benefit of this method, is bugs that eat the leaves will still have the tannin's available. The other option is to boil them, for 1 hour in Distilled or RO water, rinsing and changing the water a few times during the hour. this will sterilize, but at the cost of the tannin's and a lot of the nutrients the leaves posses, however they will last longer.
Layer 6 - Botanicals (Optional):

This layer consists of spreading around on top of the leaf litter, various types of Botanicals. Seed Pods, Palm Skirts, Large pieces of Cork Bark (or other types of bark), Sticks, Ect.. Its 100% optional, and mostly cosmetic, however your Micro-Fauna may appreciate the additional caves and crevices to roam around in.
Micro-fauna:
Almost last, defiantly not least! The stars of the Show, the mini lifeforms that make it all come together. These are the lifeblood of a Bio-Active Vivaria, they are what turns our layers of soil, into a fully fledged mini eco system. The Micro-faunas, implore a symbiotic relationship with the plants that are surrounded by. There is TONs of different types of Micro-fauna, that could be used, we will touch on a few of the most common. Why we use them, what they do, and their importance in our Bio-Active system.
Isopods:
Isopods are, in my opinion, the Star of the Micro-fauna show. Although commonly referred to as such, they are actually not insects at all, rather they are Crustaceans. Isopods come in many types, some more soil dwelling and some prefer leaf litter layer (Dwarfs, and Larger species respectively). All land Isopoda are Detritivores, meaning that they obtain nutrients by consuming detritus (decomposing plant and animal parts as well as animal feces). In turn for this, they expel nutrients in their frass, that Fertilize the Flora that shares a space.
Isopods in my opinion are the only true MUST have for a Bio-Active vivaria. Just Springtails, would be fine in a closed Terrarium, with no living animals, however once an animal is added to the picture, Isopods are a must. Ideally you will have a Soil Species (Dwarf Isopods) and a Larger Species (P. scaber is popular). The smaller species helps maintain in the soil layer, and the larger Isos, reside in the leaf litter, and will consume the animals feces.
Springtails:

Springtails, are the other very commonly used Micro-fuana. While they do show some aspects of a Detritivore diet, they are predominantly Microbivores. This means their diet consists mainly of eating microbes, especially bacteria. Microbivores can be distinguished from detritivores, generally thought playing the roles of decomposers, as they don't consume decaying dead matter but only living microorganisms. These guys are responsible for the Cleaning of Bacteria and Pathogens that we do not want around. Isopods, will do some of this work as well, as will Springtails do some of the decomposing. However optimally, you will have both. These guys too expel nutrients to the plants, as well as protect them from bacteria and pathogens that could prove deadly.
Springtails, are very small, and you will likely barely, if ever see them. They would also much appreciate some Charcoal mixed into the substrate, or a "filter layer" the charcoal removes bacteria from the soil, and the Spring eat that bacteria. I do not think you have to have Charcoal for them, but they would defiantly appreciate it.
Honorable Mentions: There is other Micro-fauna, that could be added to Vivaria, and helps in their own ways, and come with their own cons. Things like Worms, Nematodes, Millipedes, certain species of flies, Morio Beetles, (rather the superworms) and many more. Which you can also look into adding, in an effort to keep this article semi short, we will go over these in more depth in a later article.
Taking it to the Next Level! (Walls):
On last Bio-Active staple IMO, is the walls you see accompanied with many Bio-Active Vivaria. While it is not necessary to have a Bio-Active Vivaria, I feel it provides greatly to such a setup. As its out of context for this article, we will not be going in depth on this aspect, however I wanted to bring light to the positives. Adding Bio-Active walls, provides height to our Eco System, and with our misters spraying them, they can support plant life. As well as clean the bacteria in the Vivarium down for the Springtails. If you are considering a Bio-Active Vivaria, I implore you to consider Bio-Active walls. We will go more in depth in the next installment of this series! Some quick options below, to get you started down that path!
Thanks for your time. I hope this guide has helped you in some way. If you have any questions or concerns, or thoughts about the article, feel free to leave them below. Have a great one, and start your Bio-Active world soon! You will love it of that I am sure.
As of recent times, a lot of folks have been asking questions, and for guides on Bio-active Enclosures. How to set them up, how to drain them, how they work, why they work. I figured it was good and Time, that someone sat down and made a Guide! I have been meaning to do so for Years, but never found the time, until now! In this guide we will try and cover all of those aspects, in some detail.
This is the first of a Series, of Articles. meant to be an introduction to Bio-Active Vivaria, we will cover all aspects in further detail in each article of the series!
Bio-Activity, What is it?:
The real term "Bio-active" has a different meaning than what we use it for, sort of. However in our use case a Bio-active Enclosure is a 100% self sustaining ecosystem. This means, it uses all of the components with in the enclosure as it would in nature. It is in direct contrast to the typical aim for Captive keepers of Herps, and especially Chameleons.
Instead of fighting natural processes, eliminating bacteria, removing feces and urates, cleaning mold, ect we allow these things to flourish, and remain. By doing so, we allow the our Artificial Ecosystem to operate as it would in Nature. We encourage the growth of Fungi, Bacteria, Molds, ect, as in return, they provide our other lifeforms, which turn these into positive outputs, such as nutrients for our plants.
A Bio-Active "Soil" is composed of many different layers, each serving an important function, to create this "Eco System" for the most part, these same Layers, or similar ones exist in Nature as well, and they are a crucial part to making everything work. You can see a Summary of the Layers, on the Left, but we will go more in detail about them, why we need them, and what they should be composed of.
Bio-Activity, Benefits:
Arguably the largest Benefit to Bio-Activity, is it is a more natural way to keep our reptiles. The ecosystem created, mimics more closely a natural habitat, which a lot of keepers feel as a positive. However there is a few more benefits that we will go over, some proven, some not.
Plant Health:

A common saying around here, for Traditional Keeping, is to use Fertilizer free soils, and to never introduce Fertilizers to the Plants or the caging. This is a short sighted approach, it makes sense I guess, for the Animals, however the plants need nutrients, that is what Fertilizers are, nutrition for the plants. You will never get the healthiest, strongest, plants without providing them nutrition. Bio-Activity provides this in a way more akin to the way they would receive it in nature.
Cleaning, or lack there of!:
Bio-active Vivaria, does not need to be cleaned! This is always a Favorite, by many keepers looking into Bio-Activity. As stated, we are in direct contrast from traditional keeping. We want Molds, Bacteria, and Fungi. Our Lifeforms, use these to create positive nutrients, because we are not having to remove bad bacteria, we also get to leave the good bacteria. Providing even more benefits.
Immune System Boosting:

The best way to boost your immune system, is to use your immune system. Think of the Immune system like a muscle, the more you work out, the stronger that muscle is. In a traditional keeping plan, Cage Cleanings are frequent, we are removing pathogens, that could cause issue. By doing so, we are removing our animals exposure, thus their immune system no longer needs to fight off pathogens. The result of this, is a weaker, untrained immune system that leaves the animal vulnerable, when the immune system is needed.
Bio-Activity, Disadvantages:
I do not find it fair, to provide all the Advantages, without discussing some of the downsides or issues. So here we go!
Cleaning, Or lack there of ability!:

That is right, one of the largest pros, is also a major con. If a situation ever comes about where a serious pathogen, or something like a Parasite was introduced. Its not as easy to rectify the issue. In the case of a serious pathogen or parasite, pretty much everything has to go. Depending on the severity of the situation, this means at minimum, your Bio-active layers, and everything in it (including the Lifeforms). At most, depending on how you did your cage (walls, plants that are mounted, ect) these may also have to be thrown away. This can be a substantially expensive issue in some vivaria. To give an example, my Large Bio-active, has Cork Tile walls, across all the 4x2x4 area, the total price for that cork tile, over 300 dollars. If there was a parasite issue, that is a 300 dollar loss, in cork alone.
Pests:

Pests are a large issue with Bio-active. Extreme care must be taken with adding plants from home stores ect. Its one thing to yank a potted plant with a mealy bug infestation from a more traditional Cage setup. Its an even more difficult situation to remove said pest from Bio-active Vivaria. Same as the cleaning about, its imperative that harsh chemicals and pesticides are not used in your vivaria for both the sake of your Chameleon, but also your Micro-fuana. This makes dealing with plant pests, miles more difficult. The usual Bio-Active route, is to use Predatory insects, that will predate on your pest, this can get expensive, cause other issues, and doesn't always work. On top of the fact that a Bio-active Vivaria, is more attractive to pests, like Ants, and the introduction of Leaf Litters, and Botanicals.
Cycle Time:

Cycle time, is a short term disadvantage but a disadvantage all the same. When first setting up a Bio-Active Vivaria, your going to need to allow Cycle Time. What this means is upon intial setup, your layers are complete Walls (if you do them) are done, Micro-fauna is added, Plants are added, and you begin to water your Bio-active vivaria. Your going to have the "Mold Stage", you added all sorts of life, and the ability for life to form, and have essentially created a "Big Bang". Life forms, both beneficial and not beneficial are going to pop up like crazy. Whether the are spores from the air, were in the soil, were with your Fuana, or whatever.
For the first few weeks, the new single source organisms, are going to take over. Mold is going to be everywhere, growing where it can, and trying to take over. In time, the Micro-fauna will begin to do its job, it will take back the landscape, and balance the ecosystem, however you have to allow time for this process to work. This is known as "Cycle Time" ideally any new Bio-active Vivaria, should allow 1 month for this cycle to complete, before introducing an animal.
Bio-Active Vivaria, Whats Involved:
Now we will get into the fun Part! Your sold, you want to have a Bio-active Vivaria. What do you need to Accomplish this, how much will it cost, how do you set it up, what do you need to look out for. We will go over all of that now. We will take a quick look, at each "Layer" of the Bio-active Vivaria, and go further in depth on each in later Blog Articles.
Cost:

I wanted to go over this first, as it is another common question that comes up. Its is also a deterrent, for folks that think it will cost a lot.
It can cost a lot, or it can cost almost nothing, if not nothing at all. The cost depends heavily, on what you have around, what you want to accomplish, and how much ingenuity you use. The amount of money required, A lot to nothing, is completely based on your decisions, so dont let a low budget Deter you from going Bio-active. I dont want to go too much in depth, with any one aspect with this Intro, so I will touch on a few options you can buy, and a cheap/free option.
Soil Bin:
The soil bin, is the first and pretty much most important part of the Bio-Active Vivaria. This is the bin we will use to hold are Bio-Active Layers. If your using a Glass Vivarium, odds are you already have this built into to the Vivarium. However if your using a screen cage, or DIY cage, your going to have to figure out a way to hold your soil layers. All you need, is some type of bin, or bucket, or box, that is waterproof, can retain water, and is high enough to support the layers, and preferably the same size as the enclosure.
We will go later in depth in how to, of a few different builds of Soil Bins for Screen cages, and a way to seal it in a DIY cage, in a later article. For now, there is commercial options available, from Dragonstrand, or you could use Pet Trays, Bus Trays, it really depends on the size of your cage, so its hard to give recommendations. However Dragonstrand makes them for their own cages, and Reptibreeze, so screen users can look there.
Layer 1 - The Drainage Layer (1 - 2"):
The very bottom most layer, and our first layer is the Drainage Layer. The intention of this layer, is provide a place for excess water to go, ideally in a perfect system, there will be very little if any water in this area. This is more of an insurance policy, a just in case situation. You can add a Drain to your soil bin, in which case your drainage layer, will always be drained, or drain-able on demand. You can also add a small pipe, like PVC, in a corner of the Vivaria, that is as high as all the layers, and reaches into the drainage layer, if you need to siphon out excess water. There is a few media, that you can use to create the drainage layer. We will go over a few.
Egg-crate Light Diffuser:

My personal favorite is Egg Crate Light Diffuser. It is a material, that is made up of crossing piecing forming squares, of lightweight plastic. It has the benefit of being a very light Drainage layer, and also holding the most water in the Drainage layer, as it takes up low surface area. To create a drainage layer from this material, you will build a box, from the pieces with Zip Ties. Or cut a piece the size of your soil bin, and use some other material to build "feet" to raise the material, an inch or two off the bottom.
This material can be purchased at pretty much any home store, Menards, Home Depot, Lowes, usually in 2x4ft panels (so you can do a few vivs). Its usually white only at the various home stores, however online sources do provide it in other colors, if your using a glass tank and would like a diffrent color of drainage layer, as it will be visible.
Hydroton/Lecca/Lava Rock:
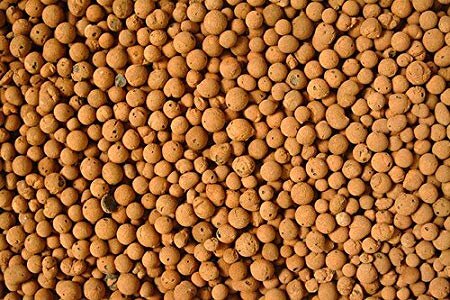
These 3 materials, are Rock like structures. Some of them are Round balls, others (Lava rock) are more uniquely shaped. The idea, here is similar to the Light Diffuser, we want to lay them out, an inch or 2 high. These materials are very porous so they allow water to flow into them, and thus hold large amounts water. However, in large cages, with deep layer, the weight can be quite high. You could use rocks from outside and save some Coin, however unless they are very porous rocks, they will not hold as much water, and will weigh more. We will go more in detail, with all these later, in another article, of course.
Can be sourced, from Home Stores, or anywhere that sells gardening supplies usually. For the likes of Lavarock, you may be able to find some locally outdoors however do not take without permission if its not a natural occurring source.
Layer 2 - The Separation Layer:
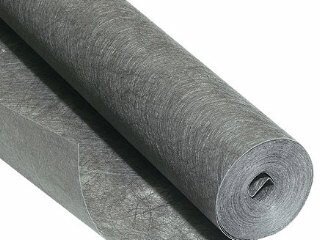
The next layer, is the separation layer. All this layer does, is separate the Drainage Layer from the Layers above. There is really only 2 good options for this layer, there is a few others, with niche use cases that we will go over in the Drainage layer Article later. For now, we will only discuss the 2. The best 2 choices for this layer, is Fiberglass Window Screen, and Weed Control Fabric. You can use one, or you can use both. If you are to use Weed block fabric, I would advise using screen first, to provide more strength so the weed fabric doesn't rip.
You have to be careful with the purchase of Weed Block, as there is a few different types. One is a Plastic black sheeting, sometimes with holes sometimes not, you do not want this. You want the weed block that allows water to freely pass through it. It will be kind of see through, like sheer clothing, when held to the light.
When cutting out your Separation layer, you want it to be a few inches bigger, on all sides than your Soil bin. This way when put it in, you can run some up the sides of the bin, to make sure the soil does not fall into the drainage layer on the sides.
Layer 3 - The Filtration Layer (1/4 - 1"):
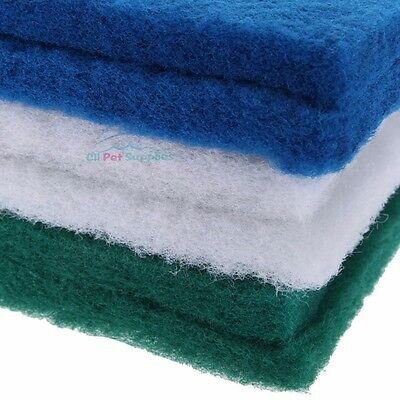
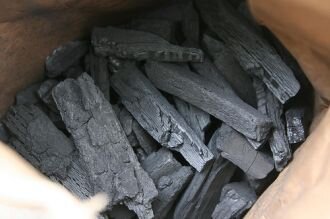
This layer is Completely optional, and not really needed in our use case. It is more so for closed Bio-Active terrariums where the water is recycled, in the closed container. Though you can still add it, if you want to, so I added it. This layer is very simple, it is simple Charcoal, just a nice layer of charcoal. 1/2", 1", or even more, all this layer does is filter out contaminants of water that falls through the basin. If your soil bin has a drain, and you want to save the drainage water for some reuse, then you will want this layer. The type of charcoal that is usable is either "Lump Hardwood Charcoal" or "Horticulture Charcoal" not not just use Barbecue charcoal briquettes. If you have a smoker, where you burn hardwood, that charcoal would also work however. I have never tried it, but have heard that Aquarium Filter Media, could maybe would also work.
Layer 4 - The Soil Layer (3+"): Now we have reached the meat and potatoes, this is what everyone came for we know it! There is way to much information to go over, with soil to even scratch the surface in this article. So we will go over, what we need main component wise, loosely, and will have a Article later, on Soils. I will also recommend a few decent commercial soils I have experience with. As we go over the various aspects that make a good soil, and why, we will add "Parts", this will in turn read as a recipe to a basic soil mix, you can DIY yourself.
Soil Base (1 Part):
For our soil base, you can use a few different products, Cococoir in a powder Form (Eco Earth) is a great one, and my personal favorite. Its the longest lasting and has decent moisture retention. However some other options that you could use, are Dirt (from a clean pesticide free area), Potting Soil (Top Soil), or Peat Moss. I personally do not like Peat Moss, as it breaks down fast and is not a sustainable resource, a lot of Gardening groups, would like to see it banned from use.
Coarse Additive (1 Part):
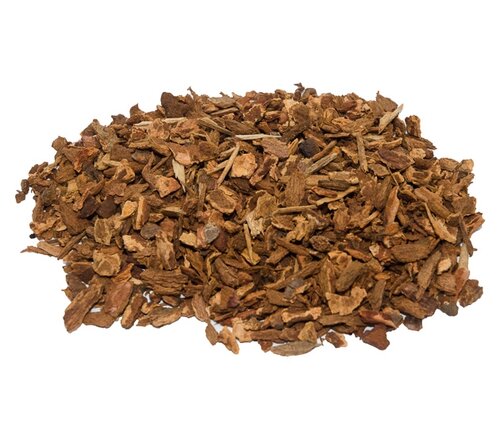
For our Course additive, you can use anything from "Fine Bark" small pieces of Bark, Orchid Bark, Reptibark, ect, (make sure it is not dyed). To Twigs and Sticks, from Hardwood trees, broken into small pieces, or Tern Fern Twigs, ect. You can use either, or you can mix both for better contrast.
There is also Mineral based options for this aspect. You can use things like Perlite, Lava Rocks (medium to large), Hydroton, Broken Pieces of Clay pots, Grow Stones, ect. The point of this additive, is to provide, aeration holes in the soil, help it drain better, and keep the soil from compacting. You can use just bark additives (most common) or you can mix bark with stones, or use just stones. Its really up to you!
Moisture Additive (1 to 2 Parts):
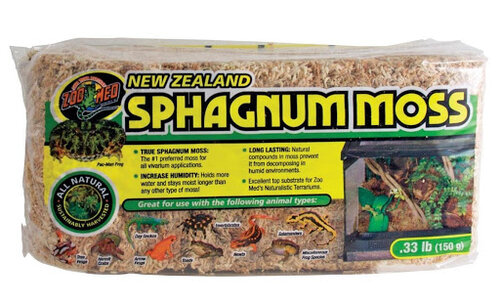
This addition will be a moss product, that will aid the soils ability to retain moisture. We want our soil to hold good moisture for the plants, but we do not want it to retain too much moisture either. For a lot of tropical species, like Dart Frogs, many suggest 2 parts of this additive, for Chameleons, I lean to 1 - 1 1/2 parts. We mist, a lot so moisture will be added in much more than many other tropical vivariums, so a better draining soil is paramount here. Also you can always add more, you cant really remove it however. The best and easiest option for this, is Sphagnum Moss, other types of dried moss work, but Sphagnum is easy to source and works well. I like to use Long Fiber Sphagnum, and cut or rip it up to smaller chunks.
Sand Additive (1 Part):
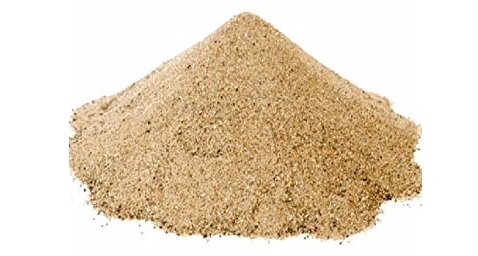
Sand additive, is to add some more Coarseness to the soil, and improve drainage. It also helps the soil hold shape and tunnels better, especially important for females as a lay bin. You can use any type of sand or rock for this, such as Play Sand, Reptile Sand, Horticultural Sand (larger granules) or things like crushed up "Grow Stone" or Lava Rocks. Basically we are just trying to add some grit, which will allow the soil to retain structure and improve drainage. There is tons of options, too much to talk about here, so stay tuned for the soil article, where we will dive more in depth with different types of sand, and rock, and how they affect the soil, and the PH.
Commercial Offerings: There is a plethora, of good commercial offerings on the market, a few I have tried and a ton I have not. I will just name a few easy to find options that I have experience with, to give you a good starting point, and a few proven options.
Layer 5 - Leaf Litter (1-2"):
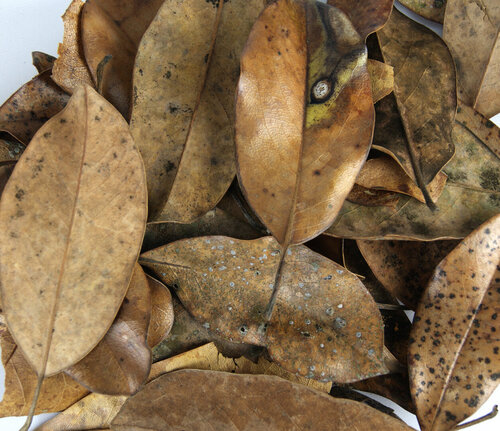
This is likely the easiest layer, its simple as it says, Leaves, littering the top of the substrate. You can use pretty much any leaf you want, some will deteriorate faster than others however. I like to use Hardwood leaves as my Leaf litter base, such as Oak, Magnolia, Willow, Maple ect. I then use, and allow the dead leaves from my plants to drop on top, and add to the contrast. You can buy your leaf litter, or you can go find it yourself, from areas that are Pesticide free. There is a large debate among bio folks, whether these leaves should be sterilized, we will save that for another article.
If you want to sterilize them, there is 2 options I will bring up. Baking them at 250 degrees, for 30 mins will get this done, however it also makes them more brittle and they will deteriorate faster. The benefit of this method, is bugs that eat the leaves will still have the tannin's available. The other option is to boil them, for 1 hour in Distilled or RO water, rinsing and changing the water a few times during the hour. this will sterilize, but at the cost of the tannin's and a lot of the nutrients the leaves posses, however they will last longer.
Layer 6 - Botanicals (Optional):
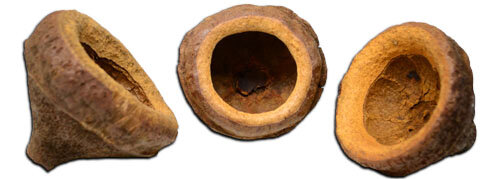
This layer consists of spreading around on top of the leaf litter, various types of Botanicals. Seed Pods, Palm Skirts, Large pieces of Cork Bark (or other types of bark), Sticks, Ect.. Its 100% optional, and mostly cosmetic, however your Micro-Fauna may appreciate the additional caves and crevices to roam around in.
Micro-fauna:
Almost last, defiantly not least! The stars of the Show, the mini lifeforms that make it all come together. These are the lifeblood of a Bio-Active Vivaria, they are what turns our layers of soil, into a fully fledged mini eco system. The Micro-faunas, implore a symbiotic relationship with the plants that are surrounded by. There is TONs of different types of Micro-fauna, that could be used, we will touch on a few of the most common. Why we use them, what they do, and their importance in our Bio-Active system.
Isopods:
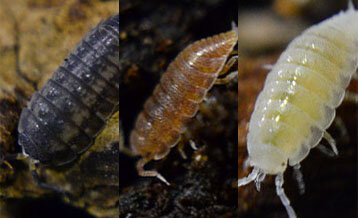
Isopods are, in my opinion, the Star of the Micro-fauna show. Although commonly referred to as such, they are actually not insects at all, rather they are Crustaceans. Isopods come in many types, some more soil dwelling and some prefer leaf litter layer (Dwarfs, and Larger species respectively). All land Isopoda are Detritivores, meaning that they obtain nutrients by consuming detritus (decomposing plant and animal parts as well as animal feces). In turn for this, they expel nutrients in their frass, that Fertilize the Flora that shares a space.
Isopods in my opinion are the only true MUST have for a Bio-Active vivaria. Just Springtails, would be fine in a closed Terrarium, with no living animals, however once an animal is added to the picture, Isopods are a must. Ideally you will have a Soil Species (Dwarf Isopods) and a Larger Species (P. scaber is popular). The smaller species helps maintain in the soil layer, and the larger Isos, reside in the leaf litter, and will consume the animals feces.
Springtails:
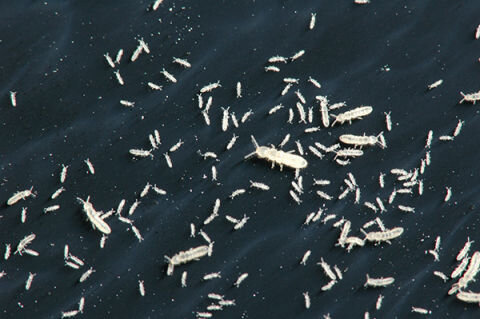
Springtails, are the other very commonly used Micro-fuana. While they do show some aspects of a Detritivore diet, they are predominantly Microbivores. This means their diet consists mainly of eating microbes, especially bacteria. Microbivores can be distinguished from detritivores, generally thought playing the roles of decomposers, as they don't consume decaying dead matter but only living microorganisms. These guys are responsible for the Cleaning of Bacteria and Pathogens that we do not want around. Isopods, will do some of this work as well, as will Springtails do some of the decomposing. However optimally, you will have both. These guys too expel nutrients to the plants, as well as protect them from bacteria and pathogens that could prove deadly.
Springtails, are very small, and you will likely barely, if ever see them. They would also much appreciate some Charcoal mixed into the substrate, or a "filter layer" the charcoal removes bacteria from the soil, and the Spring eat that bacteria. I do not think you have to have Charcoal for them, but they would defiantly appreciate it.
Honorable Mentions: There is other Micro-fauna, that could be added to Vivaria, and helps in their own ways, and come with their own cons. Things like Worms, Nematodes, Millipedes, certain species of flies, Morio Beetles, (rather the superworms) and many more. Which you can also look into adding, in an effort to keep this article semi short, we will go over these in more depth in a later article.
Taking it to the Next Level! (Walls):
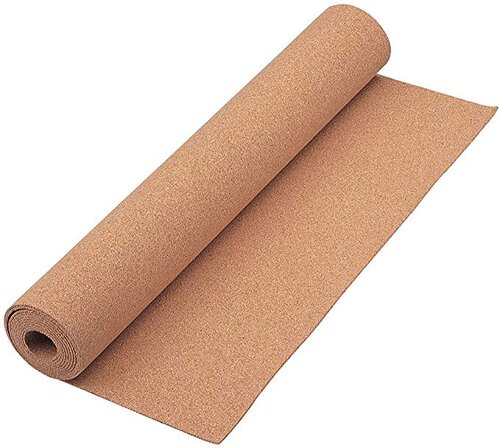
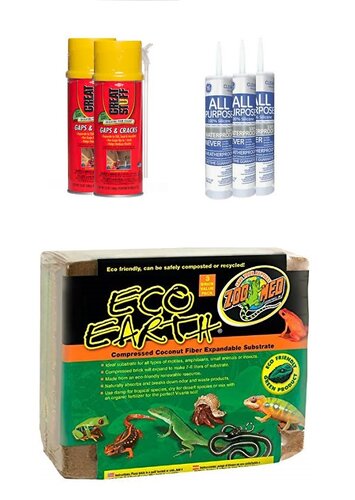
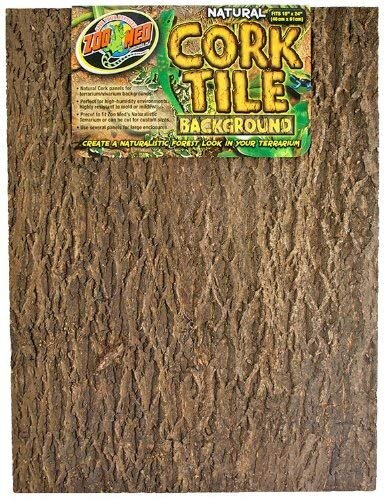
On last Bio-Active staple IMO, is the walls you see accompanied with many Bio-Active Vivaria. While it is not necessary to have a Bio-Active Vivaria, I feel it provides greatly to such a setup. As its out of context for this article, we will not be going in depth on this aspect, however I wanted to bring light to the positives. Adding Bio-Active walls, provides height to our Eco System, and with our misters spraying them, they can support plant life. As well as clean the bacteria in the Vivarium down for the Springtails. If you are considering a Bio-Active Vivaria, I implore you to consider Bio-Active walls. We will go more in depth in the next installment of this series! Some quick options below, to get you started down that path!
| Cork Roll | Great Stuff + Eco Earth | Naturalistic Cork Tile |
|---|---|---|
Price: $ | Price: $ $ | Price: $ $ $ |
Difficulty: * | Difficulty: * * * | Difficulty: * * |
|
|
|

