CasqueAbove
Chameleon Enthusiast
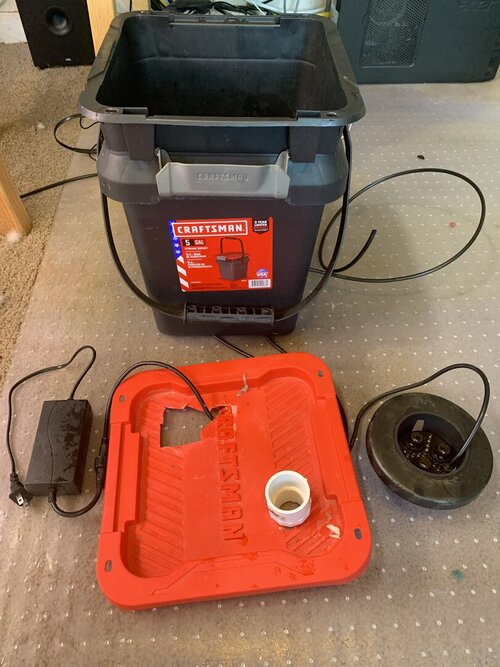
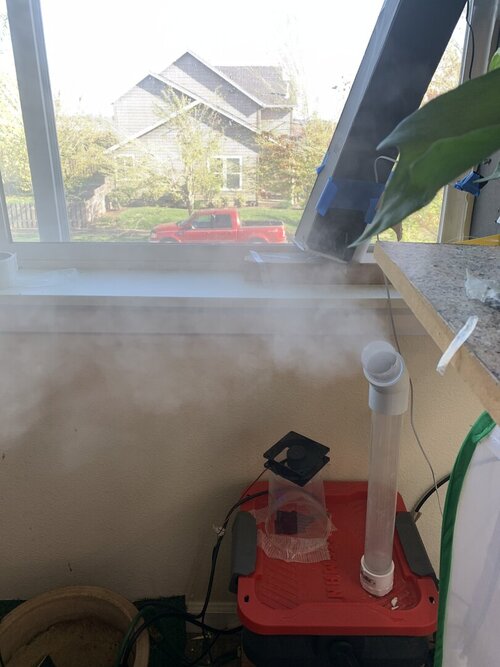
In response to some requests here is how I set up my fogging mist reservoir. It is actually quite simple and effective. saves space and only one thing to clean that rinses right out easily. Sorry if it is choppy I tried to get it done quick.
Parts:
Fogger $40 https://amzn.to/3anxSlj $40
Bucket $10 https://www.lowes.com/pd/CRAFTSMAN-5-Gallon-20-Quart-Black-Tote-with-Latching-Lid/1000976088 10$
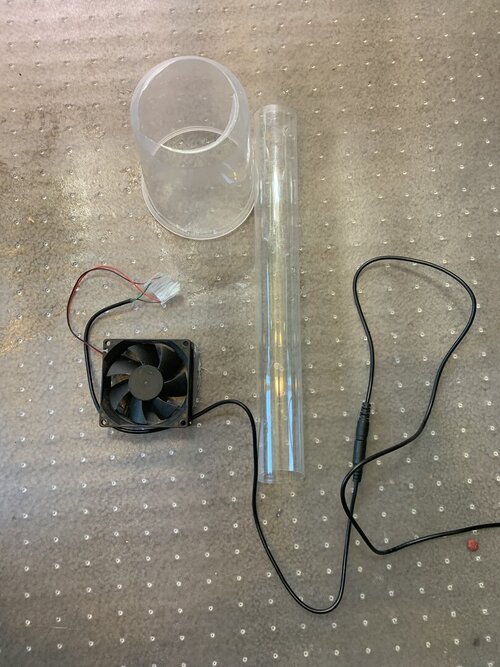
120mm fan $13 https://amzn.to/3mYQpJO I have tried a few different sizes for fans. The larger 120 seems to push better volume. This one plugs into a usb and has 3 settings which is so perfect I am ordering one.
Threaded Pipe fittings: https://amzn.to/2P2jDel
I give links for reference, but most items are easy to get at the hardware store.
PVC connectors I use 1 1/4 PVC connectors. You can also use PVC Tube but notice the clear tube. This is fluorescent light tube protector. The T8 size is 1 1/4 and fits perfectly. It is lighter weight clear and easier to work with.
Light Tube Protector : https://amzn.to/3aqqO7L I included a link, but I get these at Home Depo for $6.
32oz cup, any thing so water cant splash into the fan.
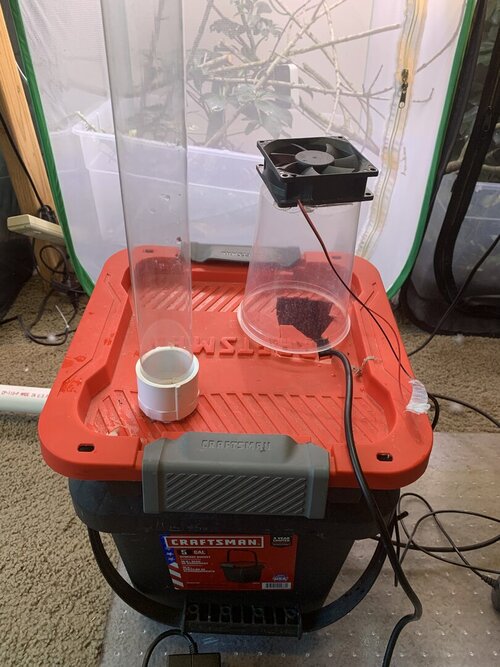
Putting it together. As mentioned when you set up the reservoir make sure the fogger can land flat as the waters goes down. It has a shut off, but if it is crocked it may not trigger and burn out the fogger. When you cut the hole for the fan, make it towards the corner. The fogger can spray up water and if it gets on the fan it can burn it out. I use the clear cup to hold the fan above, but there are many solutions here so do what works for you. I did not have adjustable fans so I had flat pieces of plastic I could cover part of the whole with until I got the flow I wanted. Using the clear tubing and PVC connectors you can make any configuration you want.
1) get a container with flat sides 5 to 10 gal is usually good.
2)drill the hole for the 1/4 bulkhead to the mister. NOTE It is best to put it near the corner. Otherwise if there it a large filter, it can cause the float for the fog to sit crocked.
3)With a utility knife cut a circle the size of the threads so it can thread in. Screw in the adapter.
4)Cut a hole for the fan to sit above. Start out small here about half the size of the fan. You can make it bigger if needed.


