Building a Screen Cage

Stripes

New Member
Hey everyone! For the past month I have been wanting to upgrade my cham to a much bigger cage, and I was wondering if anyone had any experience building screen cages? I could easily buy one, but I think building it might be a fun adventure as well as I could customize it. I was thinking about maybe making a slide out drawer with a tray so I could clean the bottom easier almost like a bird cage. I'm sure I could buy one with all the things I want, but building it might be cheaper/way more fun. Thoughts?
 
Hello, I am new with my veiled chameleon but I can share what I did for him.

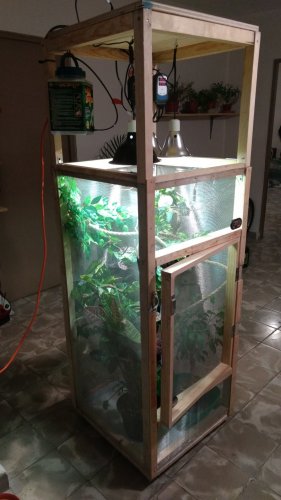
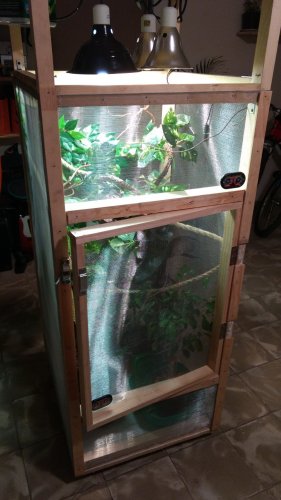
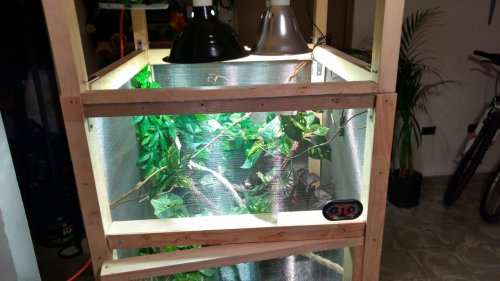
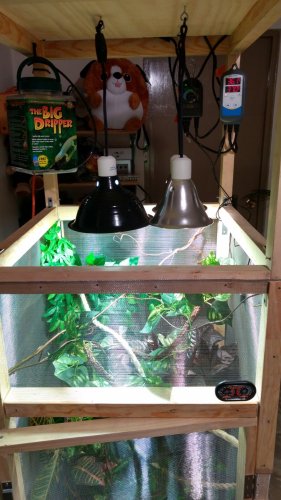
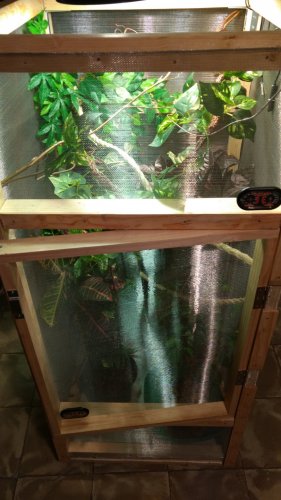
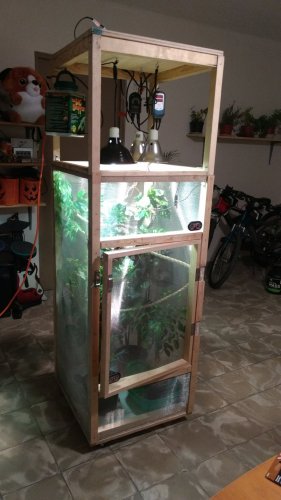
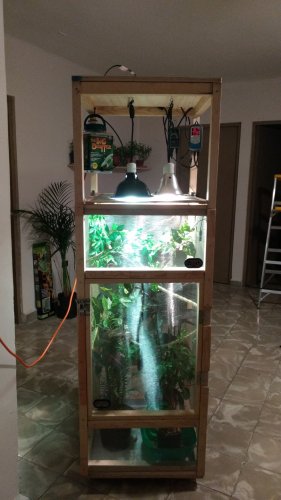
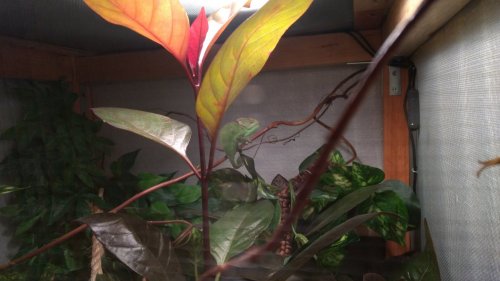
I bought 1-1/2"x2"x8' timber, used nails and a galvanized wire mesh (the one for the windows). The cage is 2'x2'x4' and my chameleon seems pretty good so far, he have been in there for 3 months now. I glued the edges of the wire mesh as needed so my chameleon won´t harm himself with it. As you can see the "columns" continue to the top to support another panel where i attached the lightbulbs, etc. I even put above the top panel the crickets in their own "cage", mealworms, supplements, etc.

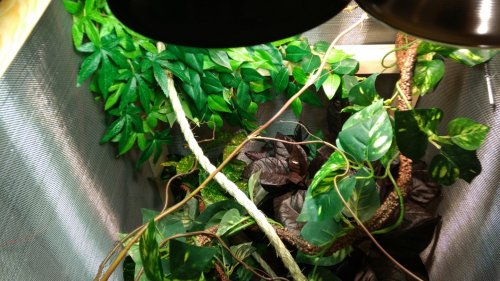
Lighting: I use reptisun 5.0 13Watt, an Exo Terra Sun Glo 50Watt, a ceramic heater for cold nights, and big dripper from zoo med. The Sun Glo and Ceramic heater are plugged both to their own temperature controller, you can see them in the pics and have different setups for day and night (the sun glo doesnt work at nights)

Water: I use a Big dripper from Zoo Med, and mist 2 times daily, before and after work.

Hope this is useful for you, let us know what you decide to do so we can share ideas.

IMG_20170815_225228308.jpg IMG_20170815_225233515.jpg IMG_20170815_225238520.jpg IMG_20170815_225243419_HDR.jpg IMG_20170815_225250532_HDR.jpg IMG_20170815_225256934.jpg IMG_20170815_225329268.jpg IMG_20170815_230258729.jpg IMG_20171110_064800785.jpg
 
Hello, I am new with my veiled chameleon but I can share what I did for him.

I bought 1-1/2"x2"x8' timber, used nails and a galvanized wire mesh (the one for the windows). The cage is 2'x2'x4' and my chameleon seems pretty good so far, he have been in there for 3 months now. I glued the edges of the wire mesh as needed so my chameleon won´t harm himself with it. As you can see the "columns" continue to the top to support another panel where i attached the lightbulbs, etc. I even put above the top panel the crickets in their own "cage", mealworms, supplements, etc.

Lighting: I use reptisun 5.0 13Watt, an Exo Terra Sun Glo 50Watt, a ceramic heater for cold nights, and big dripper from zoo med. The Sun Glo and Ceramic heater are plugged both to their own temperature controller, you can see them in the pics and have different setups for day and night (the sun glo doesnt work at nights)

Water: I use a Big dripper from Zoo Med, and mist 2 times daily, before and after work.

Hope this is useful for you, let us know what you decide to do so we can share ideas.

View attachment 195189 View attachment 195190 View attachment 195191 View attachment 195192 View attachment 195193 View attachment 195194 View attachment 195195 View attachment 195196 View attachment 195201
Wow that looks great!!!
 
If you want to build one just like what you can purchase from zoomed, you will pay more in supplies. Unless you buy in bulk, and plan on building lots of enclosures, it will cost more. Actually building the screens is easy, and I recommend buying 2 of the XL zoomeds and joining them together. The price is affordable, and you’ll have a very large enclosure. Using a wood frame is an excellent idea and will save money, but without sealing the wood, it may eventually (would be years), rot away.
 
I just built one and I have a few tips! First, I found that the bigger you go the less stable the individual screens are (if you are going with aluminum screen such as the reptibreeze or zoomed makes). I had a very hard time due to the screens coming out of square due to warping, and I think the size was the culprit. The back screen is 30x42. the sides are 20x42, and the front is plexiglass, which is too heavy by a little, but I'm making it work thanks to the wooden cabinet holding everything square whether it likes it or not, lol.

2nd tip: black aluminum screen is far superior visibility wise. the charcoal and silver colors give a cloudy appearance to the enclosure.

3rd tip, if you are screening into the aluminum frames, go with the expensive roller tool.

Good luck!
 
Back
Top Bottom