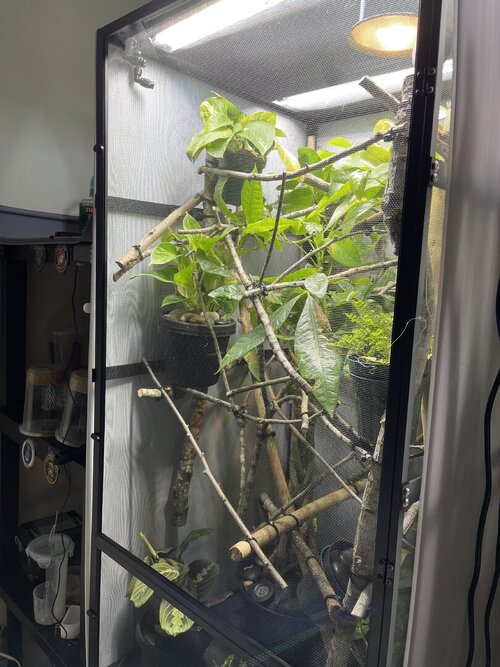
Can you help me improve this cage set up?

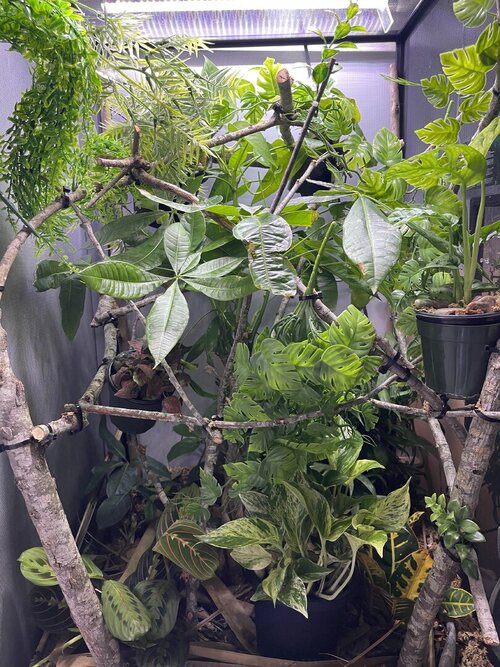
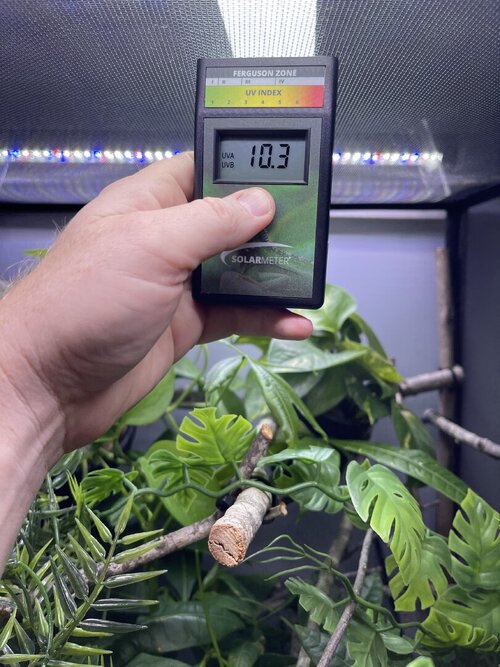
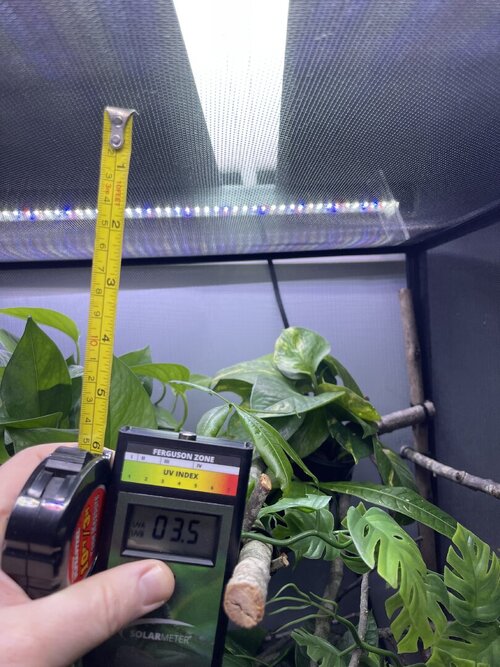
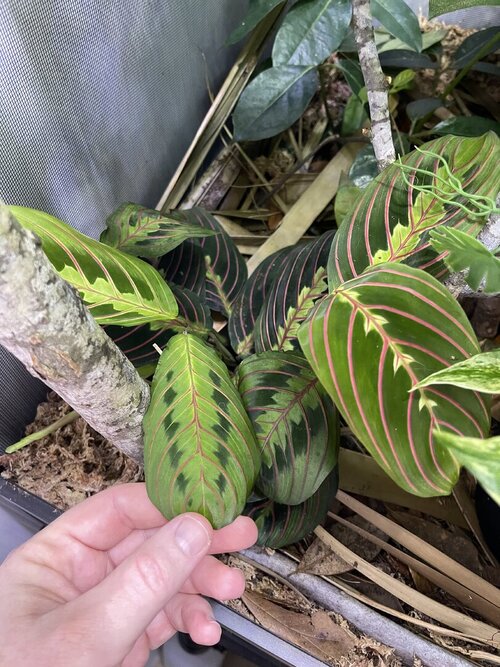
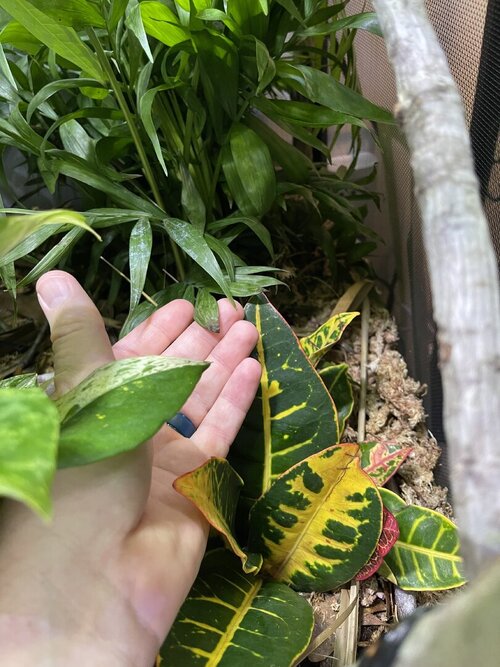
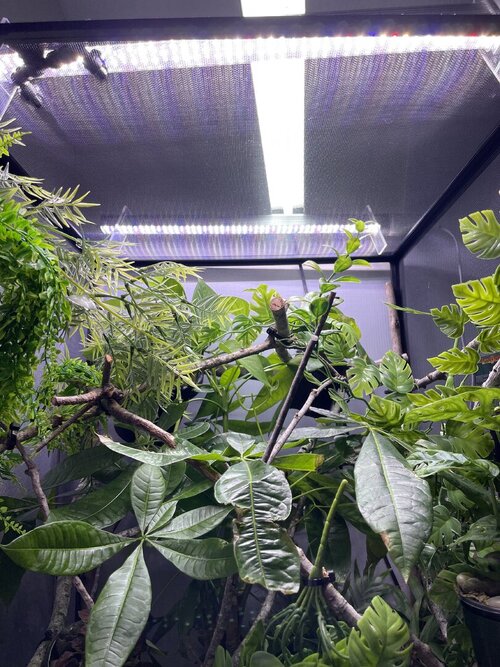
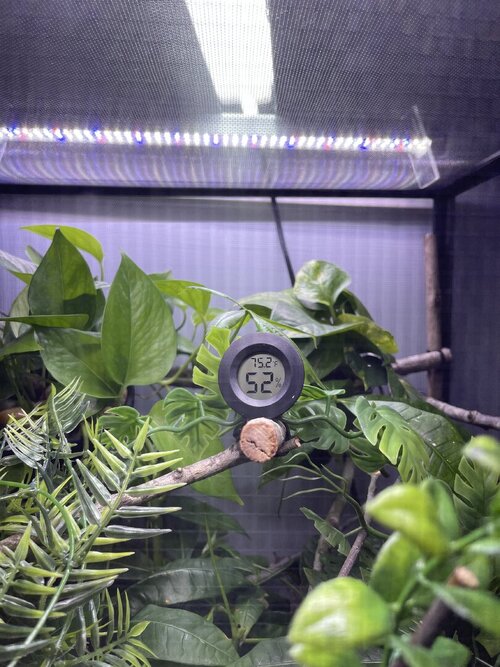
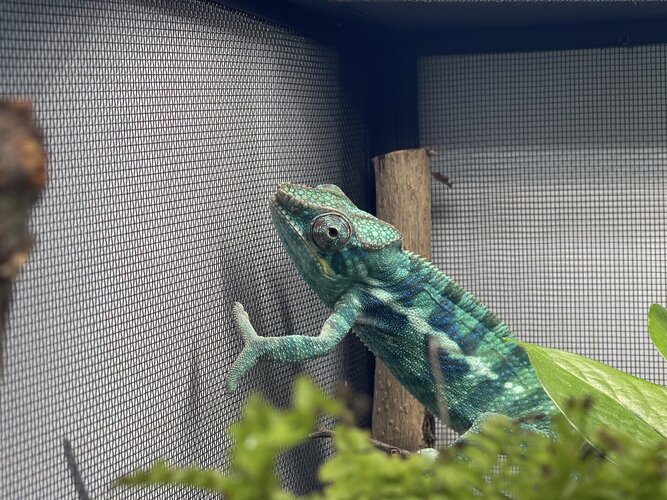
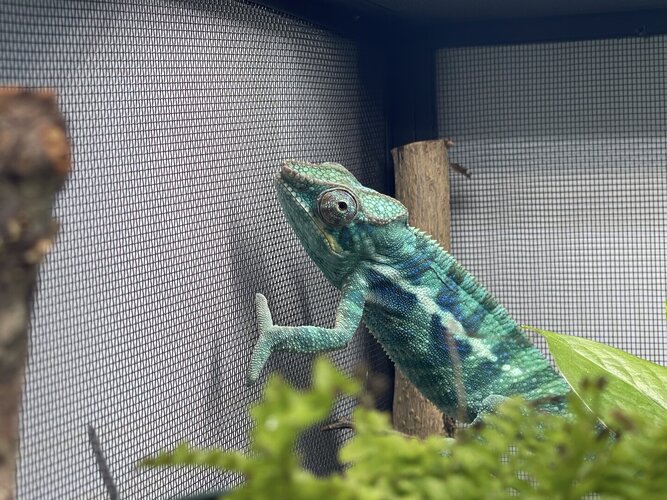
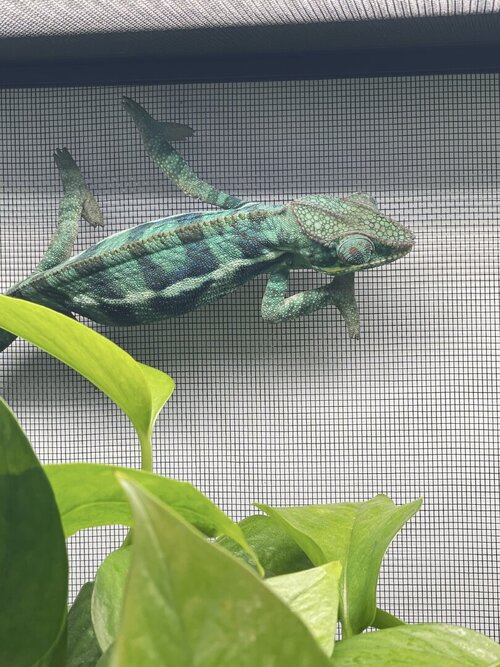
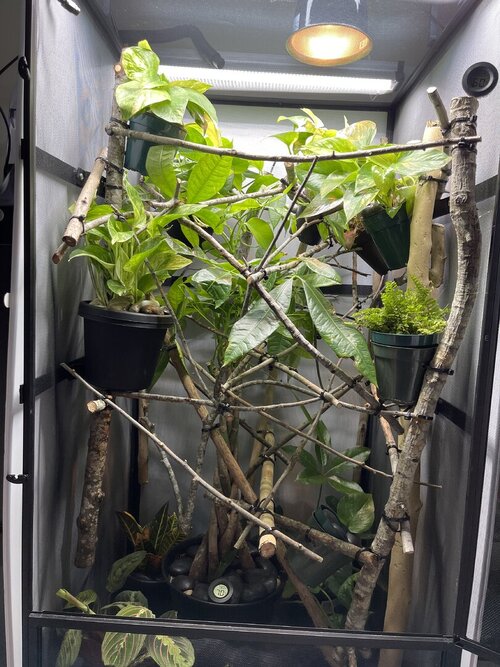
Alright here we go, new panther chameleon people here. Please do your best to be nice anything we have done wrong has not been done with malice and we are working to do the right thing. We have a male panther we got from a good breeder that was hatched Jan 3. At present he is in an 18 18 36 cage. We have been in the process of assembling his new forever home it is the typical reptibreeze xl 24 24 48. Thanks to our friends over at the you tubes we set up the floor of the enclosure as bio active with supplies from the bio dude panther chameleon package. Soil has been cycling about two weeks. Didn’t know this was more of an advanced technique (I used to keep saltwater reef tanks with live filtration etc to the algorithm may have had me dialed in above my knowledge level) any how it is what it is. We are installing dragon ledges for stability And reworking a few things. Adding Coroplast walls to control mist. Just want to make sure we are tracking along correctly. So here is what I have so far. Enclosure is on a table from ikea top branches are above my head. I am 5’11. The uvb lighting is a bit challenging as the gradient at cage top is 10 but at basking stick it is 3 3.2 Acadia light and fixture. Fixture is elevated resting on the grow lights. See attached photos. Adding a mist king and fogger that will go off a couple times a night to maintain humidity level. I have two bio dude 22 inch grow lights. Front and back of cage. Basking light is standard shield with incandescent bulb 60 watt. Temp at basking branch is appx 83 degrees see photo. Humidity at soil appx 85 percent and 68 degrees. At cage top 50% humidity and 75 degrees. We live In Houston Texas cage is being kept in my teenage sons room. Placed against far wall.

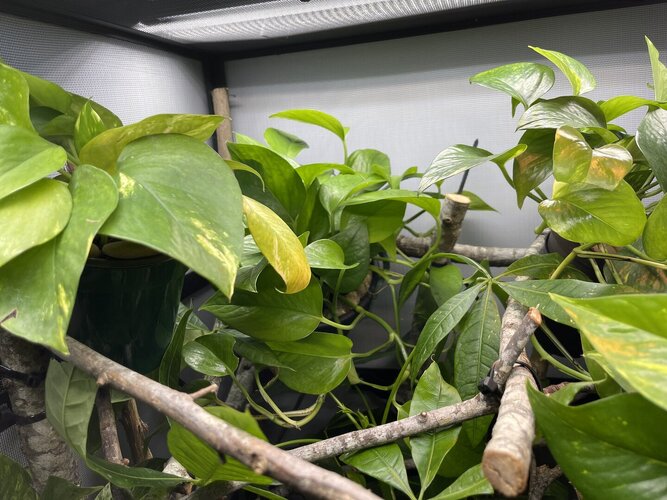
There are some fake plants in there, they are not staying we are more using them to plan out cover as we add live plants.

Been using this website Cham Academy and Neptune videos to try to get this right.

Any how thanks in advance for the guidance.

Much appreciated

C
 

Attachments

  • IMG_8538.jpeg
    IMG_8538.jpeg
    289.5 KB · Views: 39
  • IMG_8543.jpeg
    IMG_8543.jpeg
    192.5 KB · Views: 40
  • IMG_8542.jpeg
    IMG_8542.jpeg
    193.7 KB · Views: 46
  • IMG_8541.jpeg
    IMG_8541.jpeg
    240.7 KB · Views: 38
  • IMG_8540.jpeg
    IMG_8540.jpeg
    184.3 KB · Views: 45
  • IMG_8539.jpeg
    IMG_8539.jpeg
    260.2 KB · Views: 42
  • IMG_8549.jpeg
    IMG_8549.jpeg
    201.8 KB · Views: 44
Wow! You are doing amazing, especially for a first time keeper! Welcome to both you and your Cham! I promise you that we are very welcoming and non judgmental here. Many of us (including myself) had totally wrong set ups when we first got here. I received nothing but warm welcomes and helpful advice from these wonderful people. No harsh words or judgement at all. This is a very special community to be a part of ❤️

I personally have a veiled Cham so I’ve no experience with panthers. Your UVB is great. 3.0 at the basking branch is what you are aiming for so you are spot on! I will suggest removing the fake plants that you have in the enclosure. Panthers aren’t known to munch plants like veileds are, but if they happen to take a bite it’s a huge impaction risk. You can attach them outside the enclosure for more cover though if you’d like. I’ll let others with panther experience chime in on anything else. ALSO, we’d love to see pictures of your Cham!
 
Hello and warmest welcomes to you! I think you will find we are a nice bunch here and any feedback will be given in a kind and respectful way :)

Honestly for a first time cham keeper I am quite impressed with your set up.

My feedback:
1. Excellent on getting him moved into a larger enclosure. The minimum recommended size is 2x2x4, you can go bigger if you'd like. Knowing you are doing bioactive I would consider getting the Chameleon Academy enclosures for your guy. They are designed specifically for a bioactive set up and the enclosure is beautiful enough that you could proudly display it in your living room if you wanted.
2. Excellent on the height for your enclosure. I have personally used Ikea furniture in the beginning as well, it always ended up molding and breaking down due to the excess moisture your enclosure will have. Just something to be aware of. I have had better success with nicer outdoor side tables and the metal shelving units you can buy at Home Depot.
3. UVB is perfect. For a panther you want his top branch to read 3.0 or close to it. If you have a juvenile panther you may want to temporarily raise your lights and heat lamp as they tend to climb on the top of the enclosure and risk getting high UVB exposure and getting burned from the lights.
4. Other than removing the plastic plants and adding a bit more sticks I don't have any other suggestions. You have done a beautiful job and I'm sure your chameleon will be very happy :)
 
Hey there welcome to the forum. You are pretty much on point with everything you are doing. Just a few items I see.

On your LED lighting at the back of the cage. You will want it on all white lights. No blue or Red. Colored lights can mess with their eyes and cause damage.

With your bioactive set up did you add a full drainage layer as well along with your clean up crew insects? It looks like you have some moss loose on the top of the layer... I would be overly cautious having this in there as it can be an impaction risk. Leaf litter for your top later is going to not all be safer if your panther decides to hunt your clean up crew but it will hold less moisture as well.

Others have already mentioned if the baby climbs the top panel to raise up your lighting.

Additional notes. I would not free feed if that is what you are currently doing. you will get insects digging down into your bioactive layer. So look into feeder runs for the enclosure.

Also I know you said you purchased from a good breeder. I am going to recommend you get a fecal tested though before you move baby over to this cage. Should it have a parasite load trying to treat a cham and clean for this so there is not reinfection can be very timely and costly with a full bioactive set up.
 
Wow thanks so much for all the replies and feed back. We finished pulling out all the fake plants adding more high ways I the sky and extra plants for cover. Today was move in day. So far Perch is climbing the cage walls and ceiling. No so much going into the thick of the enclosure. Good ideas on raising the bulbs for uvb and heat lamp. We have ordered some stands off of Etsy that should raise the bulbs up.

We don’t free feed. We use a cup with lattice up the back for insets to climb. If he doesn’t eat them we usually pull them back out. He will usually zap 4 dubias and 3 crickets and then is kinda done here and there. So we pull them out when he loses interest.

Beman, thanks for the heads up on the moss we followed the biodude set up video and that is how he did it. If it is an impact risk though and you think it would be safer we can move to loose leaf litter. On the lights those are also bio dude sales rep didn’t say anything about the potential for eye damage with them. I believe you on the potential issues, do you know of any sources documenting the damage and what lights would be safe? As for drainage no, but the bag that wolds the substrate is cloth. The cage is sitting above a dragon strand drainage bottom. So i guess moisture ect could seep out bottom of cage through bag and mesh screen? Like I said I am probably a bit beyond my knowledge grade here and with hind sight being crystal clear and 20 20 I would have just gone with the floating garden maneuver. If the bio active becomes an issue , colapses or it becomes necessary I will move to a floating garden with an open bottom. Had I seen a few more videos first I would probably have gone with that option first. But I got to those downside risks a bit late as stuff was already set up.

As for parasite analysis is that done through a reptile vet? We have been having trouble locating a reptile vet with a lot of panther Cham experience.


Thanks again for everything everyone. Just want to give the little guy the happiest, longest life. The learning curve is pretty steep here. But we are getting there ;-)


Hope everyone Is doing well..


Chris

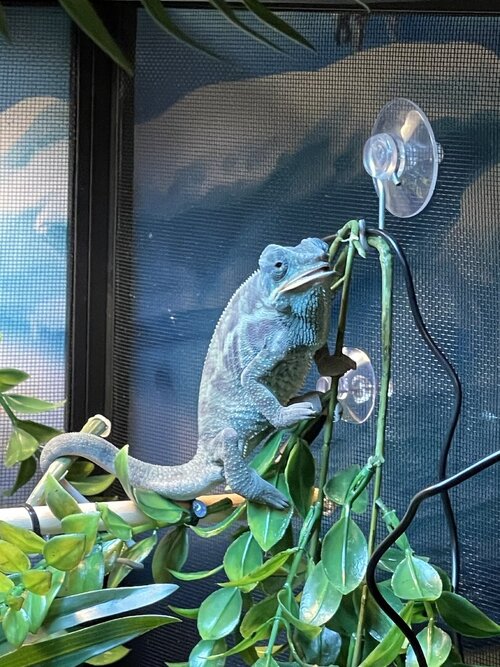
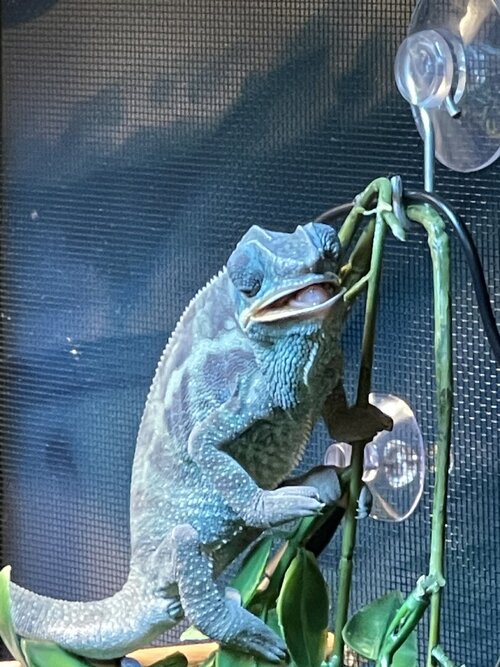
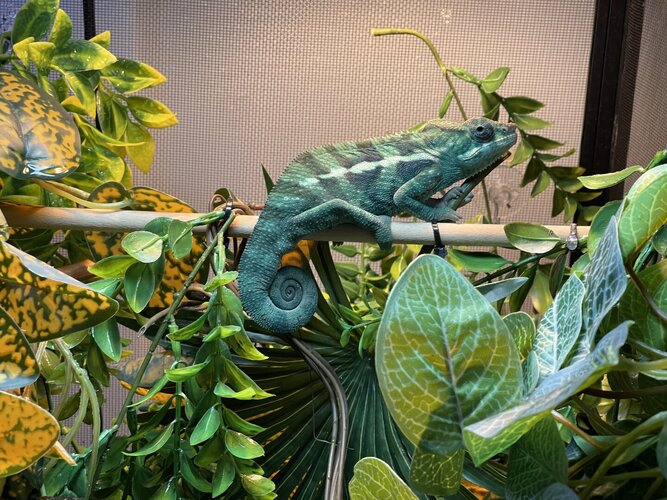
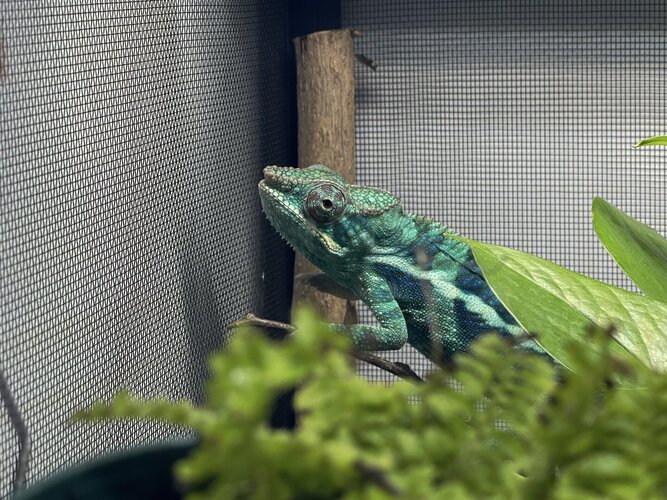
Pics are of him in the old cage with the fake plants. The first two pic are the new enclosure and him going into his new “forest”
 

Attachments

  • IMG_8476.jpeg
    IMG_8476.jpeg
    238.1 KB · Views: 29
  • IMG_8475.jpeg
    IMG_8475.jpeg
    201.3 KB · Views: 33
  • IMG_8560.jpeg
    IMG_8560.jpeg
    393.7 KB · Views: 34
  • IMG_8579.jpeg
    IMG_8579.jpeg
    351.2 KB · Views: 34
  • IMG_8576.jpeg
    IMG_8576.jpeg
    274.8 KB · Views: 37
You are right its a steep learning curve but I think you are off to a great start! I'm attaching our list of exotic vets for you to review, hopefully there is one on here in your area you can use :)
 

Attachments

  • Chameleon Forums Vet List 2024 U.S.A..pdf
    157 KB · Views: 52
Anyone have any experience with the exotic vets in Houston or the woodlands? We have used gulf coast for our English bull dog who needed a specialist. They were great with us however they are a good drive 90+ mins from the house so if anyone has a specialist they have used and liked on the north side that would be great.

Thank you again for all of the help

C
 
Hi and welcome. :) You’ve already received excellent suggestions, but I just want to put in my 2 cents about your bioactive. I don’t use BioDude stuff, but I did ‘steal’ his idea for using root pouches to hold substrate. I’ve been using them for a few years now and have had zero problems. However, it is quite important to still add the drainage layer. Not only does it keep the roots of your plants from rotting if too much moisture, but I found some of the isopods seem to love hanging out there and I think that is where they might be making more isopods. I use either the clay balls or lava rock and place some landscape fabric over it. In the past I have placed plastic egg crate also to prevent my girls from trying to dig into the drainage layer. All of my chameleons have discovered the joys of hunting isopods (one is totally obsessed with it). In addition to a thick layer of leaf litter, I provide the clean up crew some decent sized pieces of cork bark to hide beneath. The only moss I use is mixed in with the soil and I do chop it up into tiny pieces.
 
@Gingero Don't you have a good reptile vet in TX? Not sure where you live in relation to the OP but maybe you could post your vets name. ❤️
 
Hi and welcome. :) You’ve already received excellent suggestions, but I just want to put in my 2 cents about your bioactive. I don’t use BioDude stuff, but I did ‘steal’ his idea for using root pouches to hold substrate. I’ve been using them for a few years now and have had zero problems. However, it is quite important to still add the drainage layer. Not only does it keep the roots of your plants from rotting if too much moisture, but I found some of the isopods seem to love hanging out there and I think that is where they might be making more isopods. I use either the clay balls or lava rock and place some landscape fabric over it. In the past I have placed plastic egg crate also to prevent my girls from trying to dig into the drainage layer. All of my chameleons have discovered the joys of hunting isopods (one is totally obsessed with it). In addition to a thick layer of leaf litter, I provide the clean up crew some decent sized pieces of cork bark to hide beneath. The only moss I use is mixed in with the soil and I do chop it up into tiny pieces.
Dokie okie I like where we are all going here, thanks to the power of the interwebs I feel like I have learned to drive a race car super fast….. but I didn’t know what brakes were and as such didn’t know how to ask about their use ;-). Thus the social experiment with the all worlds knowledge continues for me.

To further display my ignorance…. The drainage layer does it go in the tree root sack or under it? To put that in with the enclosure up as is if it is In the bag, would we just dig up soil add clay balls land scape fabric ect and kinda fill the dirt back in on top of them?so you can work your way around cage that way? Or is it a case of we need to lift sack slightly maybe through maintenance door and add them there?

Sorry for so many questions just trying to set it up right. Kinda like building the space ship after blast off and during climb out.

Hope everyone is having a great weekend

C
 
I put the drainage layer in the bottom of the pouch. Then a divider to keep the substrate separated, then the substrate. It would be a good amount of work to undo everything, but it’s better to do it now than later run into problems.
 
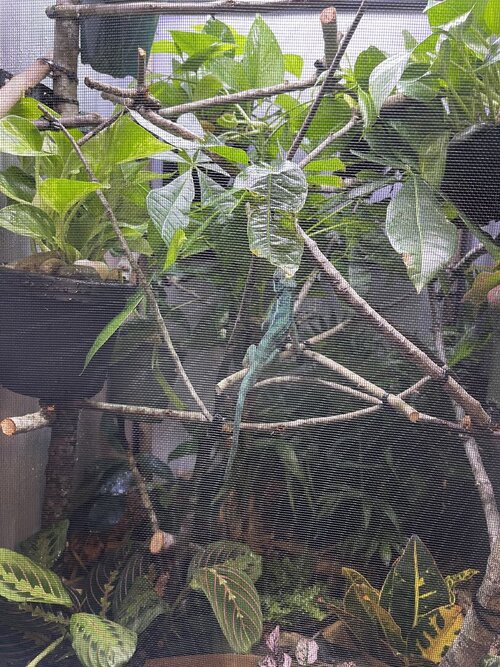
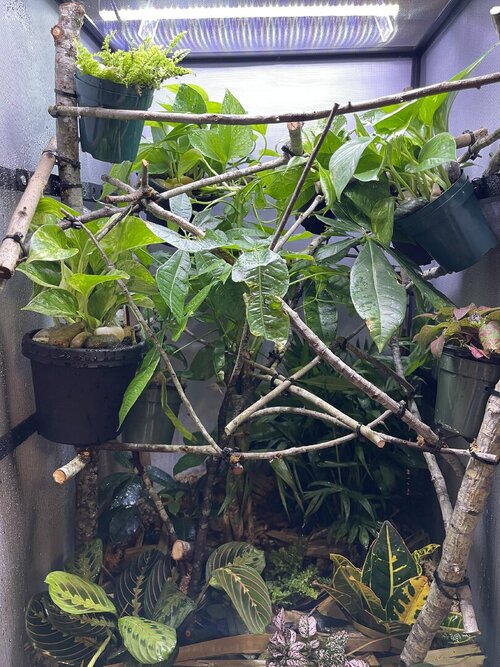
Dokie okie my chameleon teachers…. Enclosure has been re done….. paranoia took over and I pulled out the bioactive floor. Plants potted and redone. Open floor with potted plants no moss. Maybe a straggler piece or two in the potting soil. Where does everyone get the flat rocks that you put in the top of the planter pots? I looked at some hardware stores but nothing but larger river stones. Any ideas? Lights replaced with jungle dawn…. What else do we need to do? Thanks for all the help with this……. And now pics of perch the tree dragon and the redone cage.
 

Attachments

  • IMG_8620.jpeg
    IMG_8620.jpeg
    215.8 KB · Views: 34
  • IMG_8594.jpeg
    IMG_8594.jpeg
    446.4 KB · Views: 32
  • IMG_8591.jpeg
    IMG_8591.jpeg
    444.5 KB · Views: 32
  • IMG_8595.jpeg
    IMG_8595.jpeg
    257.9 KB · Views: 29
  • IMG_8593.jpeg
    IMG_8593.jpeg
    420.9 KB · Views: 32
  • IMG_8617.jpeg
    IMG_8617.jpeg
    229.7 KB · Views: 40
  • IMG_8616.jpeg
    IMG_8616.jpeg
    307.4 KB · Views: 27
Dokie okie my chameleon teachers…. Enclosure has been re done….. paranoia took over and I pulled out the bioactive floor. Plants potted and redone. Open floor with potted plants no moss. Maybe a straggler piece or two in the potting soil. Where does everyone get the flat rocks that you put in the top of the planter pots? I looked at some hardware stores but nothing but larger river stones. Any ideas? Lights replaced with jungle dawn…. What else do we need to do? Thanks for all the help with this……. And now pics of perch the tree dragon and the redone cage.
It looks like you found the rocks we use. These are river rock and you can find them at the craft stores. Just needs to be the larger stones like you found.
Cage looks really good!
 
Thanks everyone for all the advice.

Can you use the smaller two inch stones to fill in the gaps, or is that over kill and some soil exposure is acceptable? With the 4-5 big rocks providing enough cover?

For feeding we have a big feeder cup with an insect ladder and smooth sides and one of the magnetic feeding boxes. The crickets jump out of the feeder box not so much the cup. If they do is it ok to let them tool around the enclosure so he can hunt them down? I like the concept of more control but it is pretty neat to see the dinosaur tropes out of the pothos leaves and zap a cricket. Probably a bit more engaging for him as well. Thoughts one way or the other? Right now while growing we are feeding a bit of everything worms crickets dubias ect.
 
You are off to a great start with your enclosure and chameleon care!! I am not a panther owner, but I will try my best to help out. What do you have in the bottom substrate? I would remove it and just keep the substrate pan bare, especially since you have a misting system and too much water can cause bacteria buildup, and a stinky cage. This is very harmful because your chameleon can breathe in the air that has bacteria from the substrate in it, or even worse, your chameleon can climb down to the bottom and in rare cases, even get some in his/her mouth.
 
Back
Top Bottom