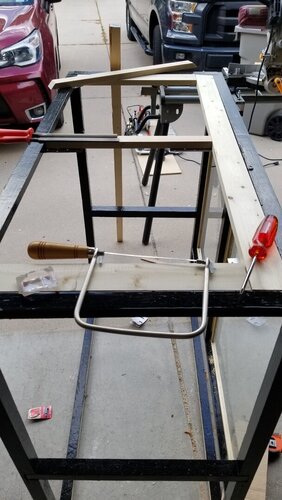
Custom build; its finally happening!

My back wall is done! Dont mind all the excess dirt laying around. Have to hit it with a blow drier once everything has cured.
I picked up the glass today for the front doors, have to find somewhere that will cut it to size for us. Other than that, we have a few more support posts to put on the frame, then seal it, then put the screen on, and it's done :eek:

Still have a lot of stuff to get for lighting and misting before we are completely ready, but we are almost there!
20190813_154444.jpg


20190813_154422.jpg


20190813_154406.jpg
 
My back wall is done! Dont mind all the excess dirt laying around. Have to hit it with a blow drier once everything has cured.
I picked up the glass today for the front doors, have to find somewhere that will cut it to size for us. Other than that, we have a few more support posts to put on the frame, then seal it, then put the screen on, and it's done :eek:

Still have a lot of stuff to get for lighting and misting before we are completely ready, but we are almost there!
View attachment 243057

View attachment 243058


View attachment 243059
I dig the arrows it’s like someone knew I had a bad neck :ROFLMAO: I love the wall! Pesto will go ape poop for that wall when it’s done
 
I dig the arrows it’s like someone knew I had a bad neck :ROFLMAO: I love the wall! Pesto will go ape poop for that wall when it’s done
I hope so! I'm not 100% sure which plants are going to go in there yet lol but I'm excited to get some color in there. I think I might attach some air plants in there also
 
I hope so! I'm not 100% sure which plants are going to go in there yet lol but I'm excited to get some color in there. I think I might attach some air plants in there also
Air plants would be cool to add. As for what to put in the pots I have no idea lol I’m still trying to figure out witch ones are going on mine. What options do you have in mind for the pots?
 
Air plants would be cool to add. As for what to put in the pots I have no idea lol I’m still trying to figure out witch ones are going on mine. What options do you have in mind for the pots?
I'm definitely putting at least 1 pothos in the top pots, maybe even 2 one on each side then the middle might be a prayer plant. I'm thinking a fern in the bottom pot. Something that grows upward needs to go in those pots lol
 
A small update on the enclosure build process. The boys messed up the sizing of the doors so we spent all day yesterday trying to adjust the doors to fit in the frame, but we did it! It looks really good and I'm happy we were able to incorporate glass doors in to the enclosure for a better viewing experience. To be honest it wouldnt have been that much of a price increase if we did all sides glass, but I think the guys would have had brain aneurisms trying to figure out how to attach all the sides effectively because they really struggled with the doors :ROFLMAO:

We also installed the panels on the top of the enclosure which we will drill holes in to for the mistking nozzles. I plan on putting 8 total holes. For now I am only going to install 4 nozzles, but I wanted the option to install more if I wanted to. Thanks @cyberlocc for the help with this and the picture you made because I would not have been able to figure it out otherwise lol.

Not included in the pictures is my back wall. I had an issue with the way the foam dried warping all weird and it detached the foam from the back wall, so I just had a bunch of sticks and pots foamed together completely detached from the wood panel on the back. Great! Thanks to the bright idea of @JoXie411 I got some plastic egg crate from Home Depot and cut little chunks out of it and put it behind the detached foam pots, drilled holes in to the board, and zip ties the egg crate to the board. I then used a little more foam to attach the foamed pots to the egg crate and weighed it down with bricks(I forgot to do this the first time which is probably why I had an issue). We wont know if it all worked until tomorrow so stay tuned!!

What's left:
FlexSeal the rest of the pieces
Attach some makeshift dragon ledges
Drill drainage holes to the bottom panel and attach
Build an entire stand for it because I'm not trying to spend 100s on a large enough stand to fit it plus have to rig drainage for it :ROFLMAO:

We have our work cut out for us. I am hoping to have everything done by next saturday when I move in to my new apartment so Pesto can also get a new home. Wish me luck!
 

Attachments

  • 20190822_182819.jpg
    20190822_182819.jpg
    255.6 KB · Views: 174
  • 20190822_182825.jpg
    20190822_182825.jpg
    131.7 KB · Views: 169
A small update on the enclosure build process. The boys messed up the sizing of the doors so we spent all day yesterday trying to adjust the doors to fit in the frame, but we did it! It looks really good and I'm happy we were able to incorporate glass doors in to the enclosure for a better viewing experience. To be honest it wouldnt have been that much of a price increase if we did all sides glass, but I think the guys would have had brain aneurisms trying to figure out how to attach all the sides effectively because they really struggled with the doors :ROFLMAO:

We also installed the panels on the top of the enclosure which we will drill holes in to for the mistking nozzles. I plan on putting 8 total holes. For now I am only going to install 4 nozzles, but I wanted the option to install more if I wanted to. Thanks @cyberlocc for the help with this and the picture you made because I would not have been able to figure it out otherwise lol.

Not included in the pictures is my back wall. I had an issue with the way the foam dried warping all weird and it detached the foam from the back wall, so I just had a bunch of sticks and pots foamed together completely detached from the wood panel on the back. Great! Thanks to the bright idea of @JoXie411 I got some plastic egg crate from Home Depot and cut little chunks out of it and put it behind the detached foam pots, drilled holes in to the board, and zip ties the egg crate to the board. I then used a little more foam to attach the foamed pots to the egg crate and weighed it down with bricks(I forgot to do this the first time which is probably why I had an issue). We wont know if it all worked until tomorrow so stay tuned!!

What's left:
FlexSeal the rest of the pieces
Attach some makeshift dragon ledges
Drill drainage holes to the bottom panel and attach
Build an entire stand for it because I'm not trying to spend 100s on a large enough stand to fit it plus have to rig drainage for it :ROFLMAO:

We have our work cut out for us. I am hoping to have everything done by next saturday when I move in to my new apartment so Pesto can also get a new home. Wish me luck!
This is going to be one rad cage :cool: If I was a chameleon I would love to live in it
 
This is going to be one rad cage :cool: If I was a chameleon I would love to live in it
I hope so! Assuming we dont mess anything up :ROFLMAO:
Also I think i was talking to you about the babies tears in the past, but the one i put in my bioactive snake tank and it's doing really well and growing along the driftwood I have in there, so I think I'm going to buy some more to put on Pestos wall, I would love for it to grow all over the branches and stuff that I have back there eventually.
That would look so beautiful. I don’t think I’ve seen babies tears in any of my nursery’s yet
 
@snitz427 could I mount babies tears epiphetically? I'm almost positive I'm spelling that incorrectly or even using the wrong word all together
 
Only a few more days before its move in day to my new place, and Pesto gets to move in to his new place! We are coming down on the last few details of the enclosure and making a stand for the enclosure itself to hide drainage and water works under. A few more hours tomorrow and we should be ready to go!!

A rough idea of how the plants will go in to the back wall :

20190827_172342.jpg


The setup so far with horizontal braches and suspended pots :

20190827_201234.jpg


I picked up some plants today as well. A brom, 2 variations of peperomia, a silver satin pothos, and a small babies breath that I hope will take over the back wall eventually. Those plants in addition to several pothos and a fern that I already have on hand will hopefully be enough to fill in this huge viv!
 
It is finally finished!!
The final result ended up being 45x22x46in. The top, left, right, and bottom panels are all screen mesh, and the doors are glass. I used FlexSeal to seal all of the wood, and Great Stuff Pond & Stone to foam in the pots.
My final plant list ended up being 2 bromeliads, a young schefflera arbicola, a sword fern, a golden pothos, a marble queen pothos, a silver satin pothos, a dracaena, 2 different variations of peperomia, a pitcher plant, and a babies tears.
The full enclosure from the top to the custom base :
20190831_193331.jpg


Just the enclosure :
20190831_193350.jpg


A close up of the right side :
20190831_193401.jpg


The left side :
20190831_193356.jpg


Top down view from the right :
20190831_193419.jpg


From the left :
20190831_193411.jpg


There are still a few things that I need to tweak, but all in all I am VERY happy with how it turned out, and excited for Pesto to wake up to a brand new home!!
 
Pesto this morning :
20190901_070426.jpg


He is confused and hesitant. He didnt want to eat his hisser this morning which tbh is not unusual. If I had put some crickets in there he would have been all over it. But new home, new me, I'm going to try to start the tough love act and cut crickets out of my life!! Wish me luck :ROFLMAO:
 
I seem to have run in to an issue with how I am going to drain my enclosure. I need to find a tray big enough to put under this massive enclosure for it to drain in to... thoughts?
I use hardware cloth (aka wire screen) sold by Ace Hardware. I paint it with enamel paint to seal any metal residue. Home Depot sells stair ballisters which are 3' long and about 2" square and are redwood. Look in the section where wooden steps are located. make a wooden stand that is tall enough so you can slide a plastic box under it to catch water. You can do a decent job of cutting wood if you get a meter box and cross cutting saw, also at Home Depot.
 
Back
Top Bottom