New member, New DIY cage.

unspokn

New Member
Hello all!

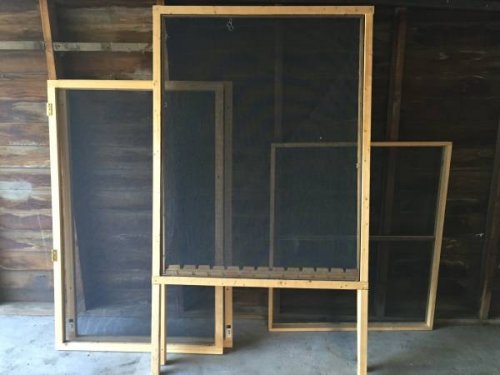
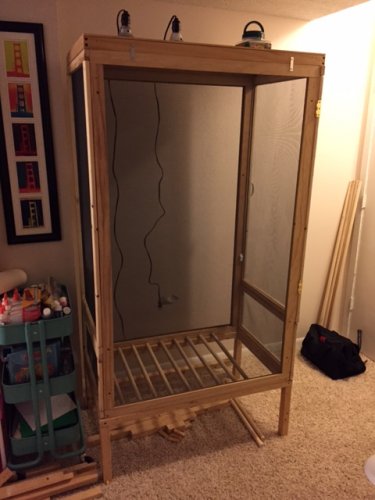
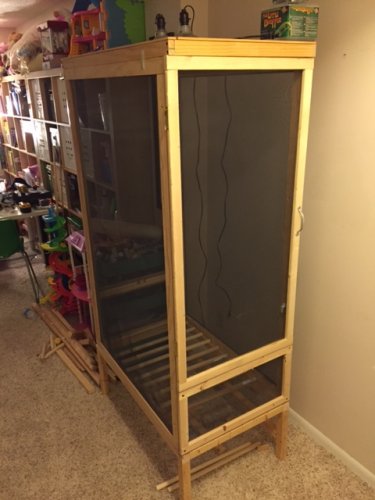
I introduced myself in another thread but I figured I would document my project here. I am new to all of this but have been doing my research. I picked up someone else's DIY cage from CL for free and it was large. It was 4' tall, 4' wide and 3' deep with another 18 or so inches of legs. Way to big for my planned purchase of a 3-4 month old Veiled. So I made some adjustments. I kept the original height but it is now about 3' wide and 2' deep.

List of items I have...
Cage (almost complete)
Two lamps (one 5.0 UVB, one 60W incandescent)
Thermometer and Hygrometer
Little Dripper (not sure that I will use it)
Hand pump sprayer (will upgrade to automated system soon)
2 Pothos
1 Schefflera
1 Ficus Elastica
Various branches my daughter has collected from the woods behind our house.

I have one photo of the cage disassembled as I never put it together before resizing it. The other two are how it sits now. I have a few more things to do to it before adding plants, heat and moisture.

Any thoughts/suggestions are more than welcome!
 

Attachments

  • 01414_ftQvKWFvEuf_600x450.jpg
    01414_ftQvKWFvEuf_600x450.jpg
    26.2 KB · Views: 383
  • IMG_0116.JPG
    IMG_0116.JPG
    115.2 KB · Views: 301
  • IMG_0117.JPG
    IMG_0117.JPG
    115.3 KB · Views: 328
Looks like your off to a good start, that enclosure should be perfect for a veiled. They love the live plants. I would be careful with the various woods, some can be toxic, I've seen a list but not sure if it was on this forum or not maybe a more experienced member can chime in on that.
 
Looks like your off to a good start, that enclosure should be perfect for a veiled. They love the live plants. I would be careful with the various woods, some can be toxic, I've seen a list but not sure if it was on this forum or not maybe a more experienced member can chime in on that.

I had the same concerns with the branches from the woods. Searching for answers I've found that if they are dead branches and have been rinsed with boiling water, they should be pretty save. Someone correct me if I am wrong. I have stripped any loose bark off as well.
 
The branches should be fine as long as you sterilized them as you said. Are you going to put a waterproof drainage system in the bottom? Looks real nice so far.:)
 
The branches should be fine as long as you sterilized them as you said. Are you going to put a waterproof drainage system in the bottom? Looks real nice so far.:)

Yes and thank you for the kind words. I have a sheet of 1/8" plastic that I am using for the floor. I plan to drill small holes in the center and have it drain into a bucket. That will be the last step in the build process.
 
Seal everything like 20 times. I sealed my full aspen cage 12 times and still is swelling and I can start to see some rot from moisture. It's a blast building them but as soon as you get it up and going you want start a new one. Good building to you!!
 
Seal everything like 20 times. I sealed my full aspen cage 12 times and still is swelling and I can start to see some rot from moisture. It's a blast building them but as soon as you get it up and going you want start a new one. Good building to you!!

I am planning to paint it. I have some silicone sealant as well that I plan on using. I know what you mean about wanting to build another. I have already started gathering supplies for an outdoors one for my deck. I have a few months before that is even a reality though.
 
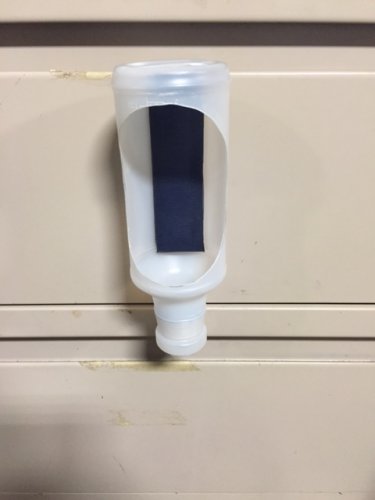
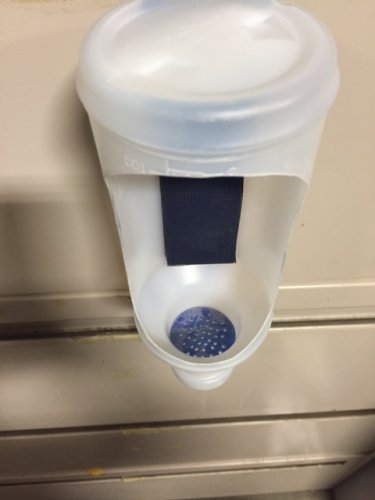
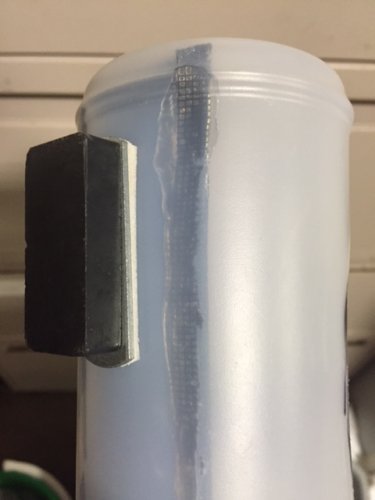
Worked on my feeder cup yesterday. I took a few cues from another member. I am pretty happy with how it turned out.
 

Attachments

  • IMG_0118.JPG
    IMG_0118.JPG
    67 KB · Views: 224
  • IMG_0119.JPG
    IMG_0119.JPG
    75.7 KB · Views: 213
  • IMG_0120.JPG
    IMG_0120.JPG
    76.1 KB · Views: 190
Looks good though you might have cut it a little too low the insects might be able climb out. Have you tried it yet? If you did cut too low I would keep the same design just a little higher cut on the bottom. I made something real similar to this and glued moss, and leaves to it to make it seem to disappear in the enclosure.:)
 
Looks good though you might have cut it a little too low the insects might be able climb out. Have you tried it yet? If you did cut too low I would keep the same design just a little higher cut on the bottom. I made something real similar to this and glued moss, and leaves to it to make it seem to disappear in the enclosure.:)

I have not used it yet. I think you may be right. However, the drain is down pretty far. It is hard to tell in the picture. It was easy to make so I won't be too hard on myself if it doesn't work out.
 
I have not used it yet. I think you may be right. However, the drain is down pretty far. It is hard to tell in the picture. It was easy to make so I won't be too hard on myself if it doesn't work out.

No I wouldn't be hard on yourself it is a brilliant design. Great minds think alike :D
 
Thank you all for the kind words... Here are some more photos of the cage painted and with plants put in. Let me know what you think.
IMG_0086.JPG
IMG_0087.JPG
IMG_0089.JPG
IMG_0093.JPG

I'm not really happy with the grow light hanging over but I am having a hard time finding affordable 3' light fixtures. It will have to do for now.
 
Your cage is looking great.

If your looking for plant lights you can always check petsmart / petco for a long dual T5 'aquarium light' they will work just fine for growing plants. I know they have various lengths available.

Also, make sure to cover the top soil of your potted plants with large river rocks. This will help your chameleon not ingest dirt and risk impaction. It will also make it harder for feeders to hide.

Keep the photos coming!
 
I will look, thanks.

I have rocks for the plants, just haven't put them in yet. I wanted to get the plants in there and make sure everything I wanted in there would fit before I added the extra weight of the rocks.

I do have a question... The initial humidity reading was at 80% and held there for almost 24 hours. This morning it was a little under 75%. I know this is a little too high and I am assuming it is from the freshly drenched plants. I may have a faulty analog hygrometer as I moved it outside of the cage last night and it barely dropped. My question is, has anyone else experienced this when first putting everything together and did the humidity finally drop to a safer level?
 
I have both an analogue and a digital hygrometer.

My analogue one is similar to yours, whereby it stays at around 70-80%. Whereas my digital one seems more accurate with readings from 55-80%.

Get yourself a digital one.
 
I have both an analogue and a digital hygrometer.

My analogue one is similar to yours, whereby it stays at around 70-80%. Whereas my digital one seems more accurate with readings from 55-80%.

Get yourself a digital one.
I plan too. I still have some time to gather materials and supplies. My family and I will be traveling a lot during the holidays so we wont be getting our new friend until after Christmas.
 
Good news on my humidity concern! After a few days the humidity dropped and has stayed at 50%. I misted last night for about a minute and it only went up to 55%.

This is exciting for me because that puts me one step closer to ordering our Cham.

However, the shock from moving the Hibiscus indoors has cause it to drop its leaves. :cautious:
 
Back
Top Bottom