first enclosure

This is very nice but it doesn't look like its 24 x 24 x 48. You should put it next to something generally familiar to everyone so that we can see it in perspective.

Were the braces on the bottom really necessary? I feel like it may get in the way of your draining.

Again, nice work!
 
This is very nice but it doesn't look like its 24 x 24 x 48. You should put it next to something generally familiar to everyone so that we can see it in perspective.

Were the braces on the bottom really necessary? I feel like it may get in the way of your draining.

Again, nice work!
I'm actually not quite sure of the exact measurements could be a bit off. The plywood backing is a 24x48 and guess you lose the inch on each side due to the width of the wood I'll take pics with measurement and find out for myself as well. I actually didn't have the intention for bracing built it with my bro in law we took a break and he got started without me and included them since it was a thought if we needed it. And if we did kind wish he used 1x2's instead but it should still work...
 
Just went and took measurement now. Depend if I put the screen inside or outside the wood. The inside measurements would be 21/22 X 23.5 X 47/48.
 
I think it looks great. You both did some really quality top notch work. You can easily build a matching base, that can hold your drip container & accessories, with the same look and finish as the main enclosure. I'm sure this was a fun project. Your brother inlaw is a good dude for helping you out with this. I just did a bunch on work yesterday on my outdoor enclosure.
 
I think it looks great. You both did some really quality top notch work. You can easily build a matching base, that can hold your drip container & accessories, with the same look and finish as the main enclosure. I'm sure this was a fun project. Your brother inlaw is a good dude for helping you out with this. I just did a bunch on work yesterday on my outdoor enclosure.

Thanks, really appreciate it. yeah my bro in law was great im not handy whats so ever. LOVE how it turned out, we will see what ends up happening with the legs. Im already double the cost i expected to build the thing and 2 foot legs will run me another 30$ (i think) not that i mind if it were ABSOLUTELY needed.

On another note absolutely no chance it fitting in my car so will be brought to me on friday. cant stand the wait to finish it up
 
oh geez, don't even start keeping track of what this addiction is costing you. just think about all the enjoyment you're getting out of taking quality care of these wonderful creatures.

i'm with you on the waiting, that's what i've been doing for a couple of months so far, and now i'm going to wait out the winter here in FL until getting my cham. i still have a bunch of things to complete on my outdoor enclosure, so its all good. check out my progress if you get a chance.
 
soooo although im not sure if its going to happen or how it would work because i dont have the tools and such at home nor really trust my own ability to do it myself have an idea about the legs and how it should be done. I want to get your guys opinions and I'll run it by my bro in law saturday when hes in and see what he thinks or what ideas he has.

I was thinking about buying 2 8foot pieces (probably 1x3's) and cut them into 8 pieces each leg would have 2 pieces forming a 90 degree around the already made feet and have a shelf in the 90degree (3 inches down) for the feet to sit on top of. If that doesnt make sense I have explained it to others as looking like a sideways T. Only potential down side of doing that is the legs will be further outside than the rest of the enclosure.

Would i need to run anything across the 2 legs to help brace it?
 
I would think you would need to do some kind of additional horizontal bracing, but I have faith in your bro in law to figure it out. One option to think about is going a "box" style base that everything sits on. You could make the over all top dims be the same dimensions as your existing feet. Create some kind of a matching front panel w/ doors that you can open and close. you can store stuff under there including your drip bucket thingy.
 
update!

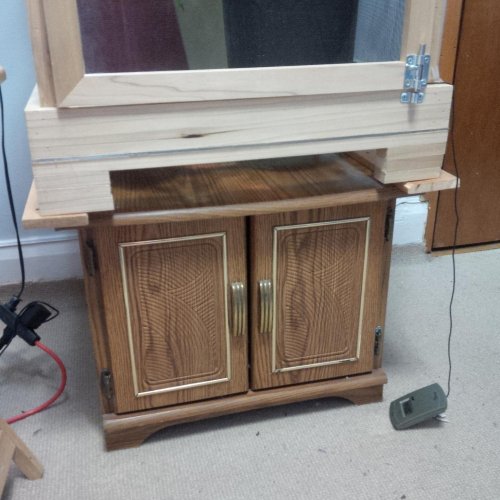
So finally got all the screening put on, put it all on the outsides and covered staples with edgebanding (adhesive trim). As for the legs or elevating found a side table that im going to use its a bit smaller than my base but im just going to add wood to the edges so it fits on top. Than just have to drill the holes for draining and put a lock on the door and its finally doneeee!

On another note also picked up several plants last week: schefflera arboricol and amate ( which i found out is toxic, so might get returned) 6" ficus and already had a pothos. few others to come :)

Oh and lights should be arriving tomorrow yayy. Ordered dual T5's from LYR and have 5 bulbs coming with it (6%) shipping gets expensive bought bulk. Ill get 6500k bulbs locally.

LASTLY, think tomorrow going to sterilize all the branches and stuff I have picked out and bake them and start piecing the inside together.

PICS TO COME SOON!
 
Sorry to crash your thread but what is a drainage pan and do you absolutly need one:eek:

The more the marry-er. No worries. There is a "pinned thread" under the Enclosure and Supplies category that shows what a ton of folks have come up with. I couldn't imagine the hassle of not having one. I have a dripper that lasts for quite some time before it runs out. Between the dripper and hand spraying, I empty out my 2 gallon bucket every morning. Its not completely full, but I made the mistake of forgetting once, and made an incredible mess. Thank goodness I got it cleaned up before the wifey saw it. Another reason I could have ended up on the couch.

https://www.chameleonforums.com/drainage-systems-cages-get-creative-102038/

Here is what I came up with. I modified a substrate tray that fit inside my DIY.

https://www.chameleonforums.com/drainage-systems-cages-get-creative-102038/

My tray is from DIY, but LLL Reptiles has what I think is even better. I had to over come the over spray that would run down the screen and onto the frame. It then would drip on the floor. I tweeked that problem w/ some plexiglass reflector panels that keeps any splash from going onto the screen and eventually down the frame. Either way I think something is needed.

http://lllreptile.com/store/catalog/-/24-x-24-x-48-screen-cage-water-tray/
 
Sorry to crash your thread but what is a drainage pan and do you absolutly need one:eek:

Eyyyy another ontarian, what abouts are you from? I wouldn't say you absolutely need one but almost everyone would suggest having some sort of draining. A lot of people will say one of their biggest mistakes in owning a cham is not having a drain set up. I had many other ideas on how I wanted to do it. And the way cage got built and me not being handy man by any means this is what I think would work best
 
...Chameleons canada only does wildcaught though...

I think you have been misinformed, I am a panther chameleon breeder having the advantage to import my own breeders directly from Madagascar, I also make some of my WC available once they have been established, treated (if needed) and trouble free.

Currently I have available Nosy Faly babies if you are interested.
 
update

Been a long wait, came across many delays. but finally some sort of update. Still not fully done.

What's been done:
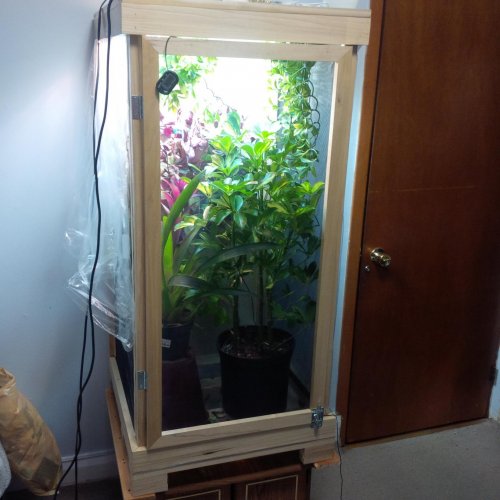
Finally got some sort of stand had the side table in storage was a bit smaller than the cage so added 2 pieces of wood so cage can sit ontop.

Lock for the door.

Arcadia T5 dual lamps.

Screen all done.

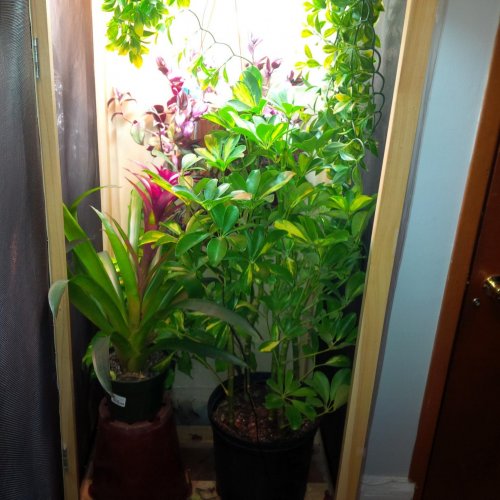
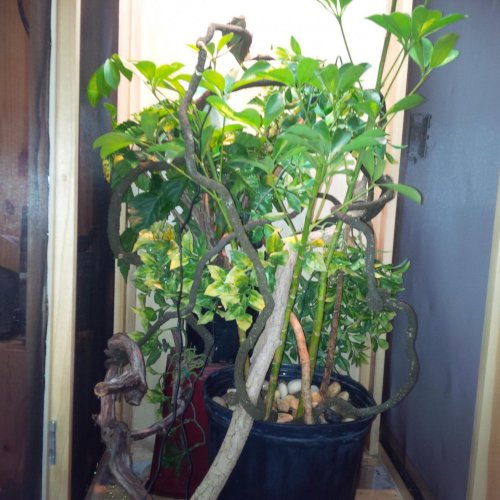
Live plants ( arboricola, ficus, brom, wandering jew) my schefflera has been dropping leaves like crazy :(.

To do:
Finish drainage. Gonna drill bunch of small holes in the acrylic flooring and slide a 3" tray under as a catch pan. I know I can figure something out and have a bucket inside the side table but we'll see.

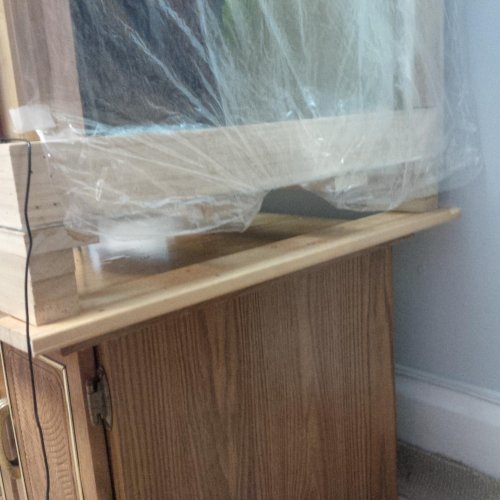
Also have to figure out way to maintain ambient temps during this nasty winter. Usually 60-70 hardly gets over 70 and basking usually 80+ as high as 88 depending when the heat is on in the house. I have plastic bags up on the sides to try and help still no luck.

Put in vines/branches. Have 10+ branches picked from outside washed and baked ready to attach with push pins ones drainage holes are drilled
 

Attachments

  • IMG_20140218_011446.jpg
    IMG_20140218_011446.jpg
    241.9 KB · Views: 209
  • IMG_20140218_011459.jpg
    IMG_20140218_011459.jpg
    247.4 KB · Views: 198
  • IMG_20140218_011532.jpg
    IMG_20140218_011532.jpg
    237.7 KB · Views: 209
  • IMG_20140218_011631.jpg
    IMG_20140218_011631.jpg
    235.1 KB · Views: 199
Haven't been at this for a while. With the size my guy was when I bought him, there was no rush. Plus I had ran into some complications. Drilling the doubled up acrylic sheets they had cracked and had to go buy more take apart the bottom half. I drilled the new sheet before putting it all together which turned out nicely. However after taking the bottom half apart couldn't get the feet back on because a nail gun was used and I didn't have one. So here I am thinking what to do. I bought furniture legs and problem solved. It actually elevated the cage more so that finding a bin as a catch pan was also easier too. IMG_20140803_105122.jpg .

and FINALLY!! I put little picasso into his big boy cage this weekend. He is now 6 months old! Just through some stuff together temporarily to get him in there IMG_20140803_105209.jpg
 
Back
Top Bottom