Lola's cage build

Thanks, I will. I'm going to try stainless mesh sink strainers first. If I can't get that to work I'll try stuffing screen through with a dowel rod and hope it stays put lol. I haven't looked around very hard for the right size strainer yet but something like this.
View attachment 211913
I think this’ll work great thanks for the cheap and useful idea! I’m building too! Always looking for an idea
 
I think this’ll work great thanks for the cheap and useful idea! I’m building too! Always looking for an idea

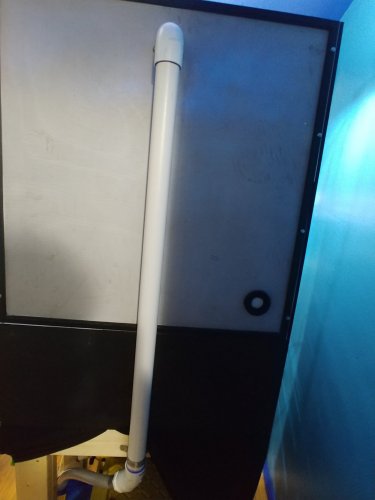
If i had been able to find one to fit 1.5" pipe easily I would've gone that route too. Couldn't find one at a quick glance though so went jacksjill's way minus glueing it in. If I had gone 2" pipe I think it would've been easier to find though.
 
Didn't get as far along as I'd planned this weekend. Sort of forgot we had a celebration of life to go to today :(. My wife text me at 1:00 to let me know our friends weren't going to need to follow me which was my reminder :oops:.

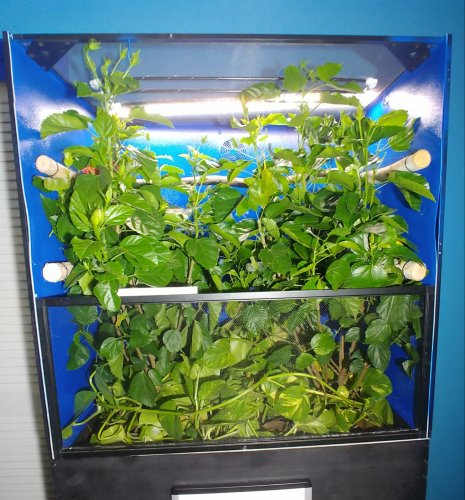
Afterwards I pulled the plants and replanted them a little lower in the box. Have the back horizontal sticks hot glued in. Three rows of "drip" line installed (thanks to @Mchartier for the idea on the needle valve usage). I'm hoping my bulkheads and elbows will arrive tomorrow for the mister heads so I can get those installed. Still need to get the rest of the sticks weaved in, get the lights put up, get the mister/ drip lines set up, plumb the fogger and maybe trim the hibiscus a bit lol.

20180819_201946_HDR-1.jpg
 
Three rows of "drip" line installed (thanks to @Mchartier for the idea on the needle valve usage). I'm hoping my bulkheads and elbows will arrive tomorrow for the mister heads so I can get those installed. Still need to get the rest of the sticks weaved in, get the lights put up, get the mister/ drip lines set up, plumb the fogger and maybe trim the hibiscus a bit lol.

View attachment 212298

Looks good. I can't take credit for the drip as it was already setup in the enclosure when I got it.
 
So first you try to give me more to do on weekends, and then you make excuses about your chores :p.

He he, jus' playin... looking great!

:LOL:, I was just trying to live vicariously through you and your project/ new lady cham :ROFLMAO:. I did tell my wife no more weekend plans until I'm done though yesterday :rolleyes:.
 
Looks good. I can't take credit for the drip as it was already setup in the enclosure when I got it.

Fair enough lol. Still better then the rainbird ball valve to soaker hose I ran before :D. So, hats off to you for sharing and the person that did it :).
 
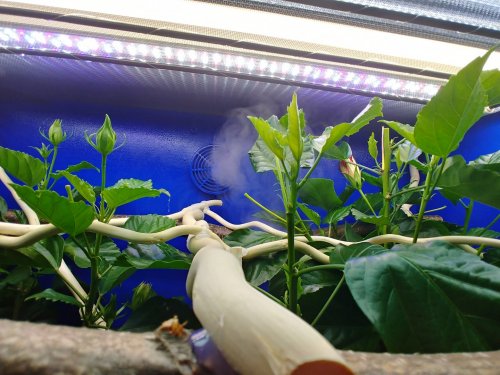
Got sticks in and misters mounted tonight before their bedtime. Tomorrow I'll work on getting the fogger plumbing a little further along. That'll probably work its way into Friday nights project time too. Then get the mister lines and driper lines run.
 
This obviously isn't the final configuration and will change once I get the ocean mist foggers. At that point fogger and mister/ drip lines will all run off the tub. But, so far I'm satisfied with how it's turning out.

20180825_191606_HDR.jpg 20180825_185302.jpg
 
I'm digging it. Wish it was a shade or two lighter but it's pretty dang close to the color my daughter wanted her ceiling ( kids pfff lol) so at least it somewhat blends into the looking up view where lights aren't at lol. One thing I would say if anyone else goes for the newer (assuming newer since it was supposedly discontinued?) formulation of fusion, be sure to leave it sit for 48 hours untouched. I was getting a little rub off still at the 28 hour mark from the wood it was sitting on.
 
Last edited:
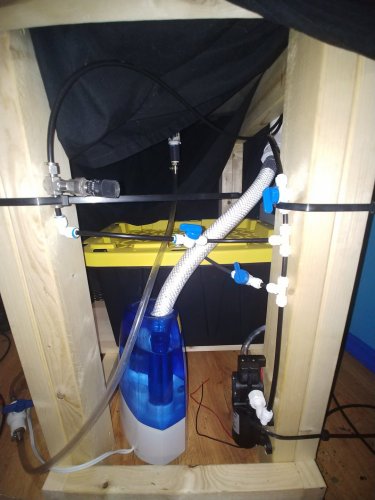
I'm gonna have to finish this part up tomorrow and slide it back in place. Then I can fill the tub and do the fine tuning. Dripper line is hooked to the swagelok ss-4mg on the left up right. I have 3/8 id tube running to the pump from the tub. I plan on swapping that pump out for a climist pump at some point down the road but since I have it on hand it got put to use lol. Since it is higher flow then climist/ mistling the first tee is pressure relief back into the tub. Second tee goes to the ball vales for the mister heads and drip lines of course lol.

20180825_220151.jpg
 
So, wish I had gone two, maybe three, fogger outputs on this one to spread it out a bit more. I may look into adding them down the road if I have to replace any plants at some point. The last lights I ordered I am not happy with so they'll be going back and I'll try something else. The two dome lights are up there for now to give a bit more punch down but not permanent, atm. I did cut out more hibiscus then I wanted but it was what I smashed while messing around inside. But here's a couple videos, hopefully they work lol.


Awesome build! Wish I didn't see the fogger and drip system though, I have enough to do already (y)

Thanks! I think that drip line is the ticket vs the soaker hose I've used before. One thing I would change on it is probably a fourth row on the back end and a second feed from the other back corner. There was a noticeable difference in drop rate from left to right (supply side vs flow through only) that I tried to even out as much as I could with the Swagelok. But, overall I'm happy with how it turned out, just need to finish up the lighting and pump swap for a quieter pump.

edit; @Decadancin did you ever grab the jungle dawn spot light?
 
Back
Top Bottom