My foam background for Reptibreeze XL

Chino82

Member
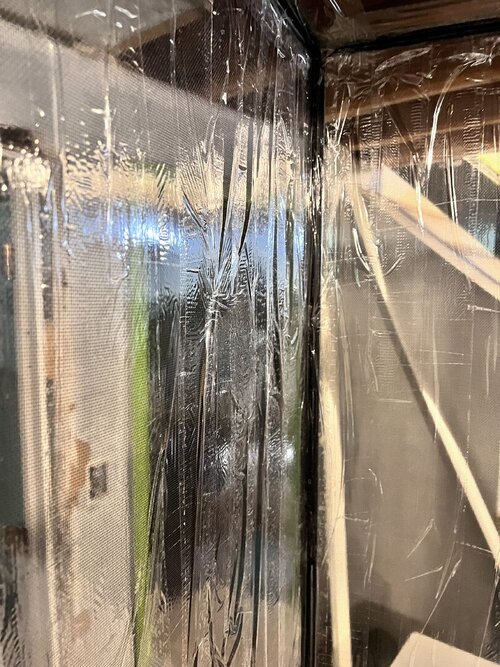
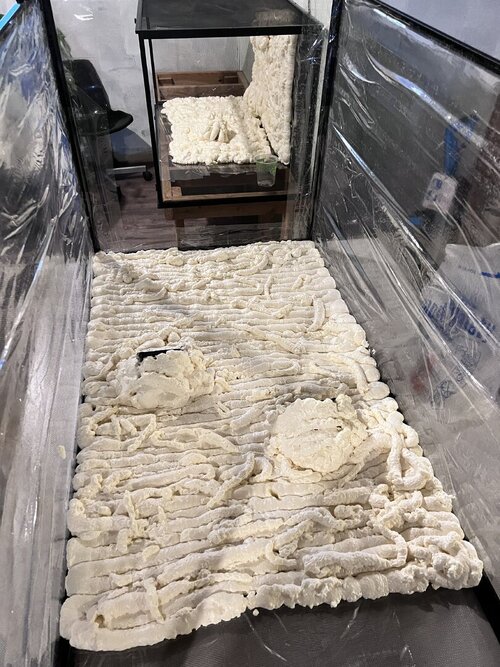
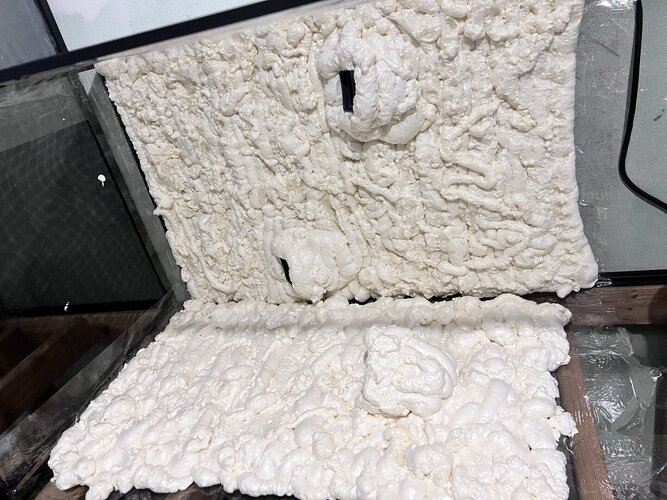
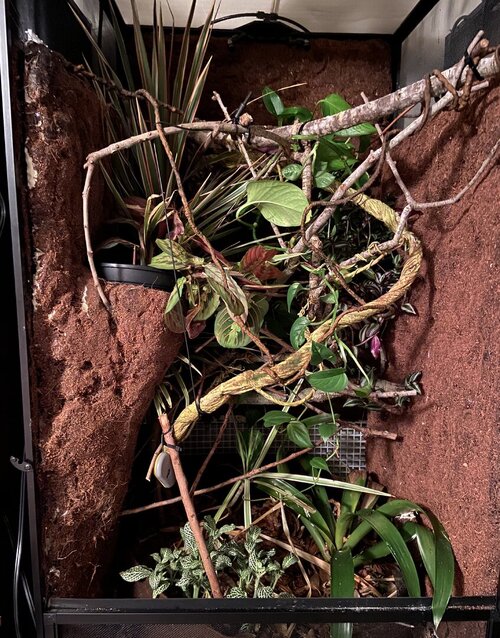
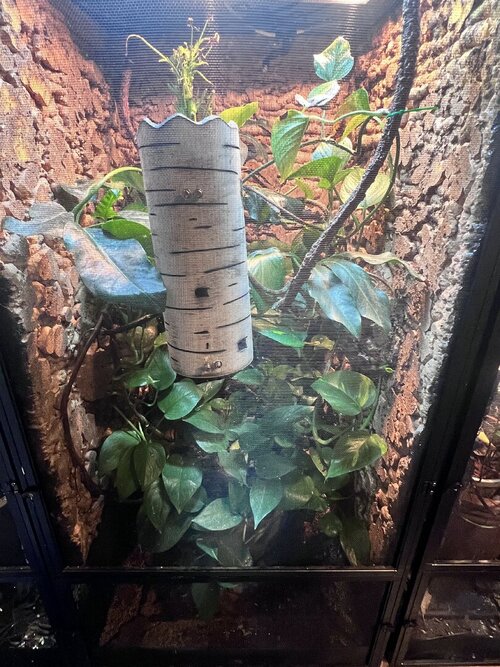
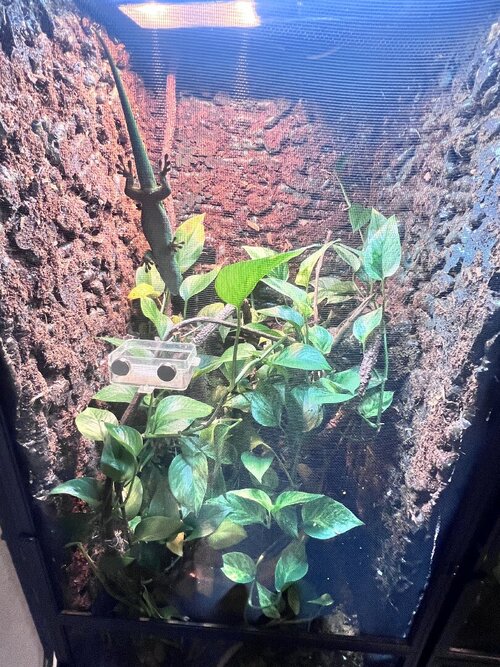
Here is the start to my foam background for my Reptibreeze XL (24”x24”x48”). I wanted to make it light weight as possible, these Reptibreezes are quite flimsy. I lined the sides with cheap packing tape and applied the foam on the tape. It took six 12oz cans of expanding foam. The bottom third is foam free as is the top and front. I plan to remove, cut into three sections, trim, paint dark brown, attach coco choir. I will hang using several 1” magnets. Total cost under $100 for three cages.
 

Attachments

  • 6CD3C633-95A3-4A42-A45F-81FBE10B99BC.jpeg
    6CD3C633-95A3-4A42-A45F-81FBE10B99BC.jpeg
    256.7 KB · Views: 149
  • 1F547B9F-18DC-43FD-8C9A-498E9C33CEF6.jpeg
    1F547B9F-18DC-43FD-8C9A-498E9C33CEF6.jpeg
    241.1 KB · Views: 139
  • D43316C2-88D1-4837-81CF-6B18A7736D54.jpeg
    D43316C2-88D1-4837-81CF-6B18A7736D54.jpeg
    375.5 KB · Views: 145
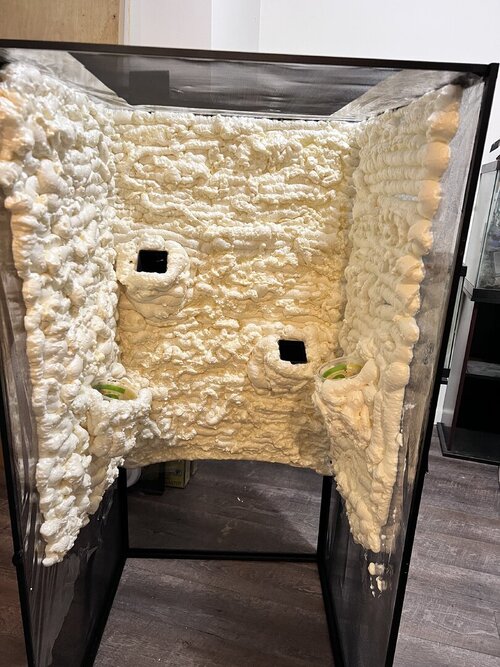
Here’s and update on what it looks like…
Old thread but wondering did you just paint the foam? Or did you do any cutting etc?

I plan to make a background for mine. I’m making a bioactive out of reptibreeze xl. I made a bottom it’s attaching to out of pvc board and a glass bottom with a drain. I just need a background for just the back side I’m thinking. I have dragon ledges installed too which would be easy to reconnect to a diy background. Just wondering your process I like the outcome.

Although I will probably use sand for texture in the paint. Also did you use anything to waterproof it?
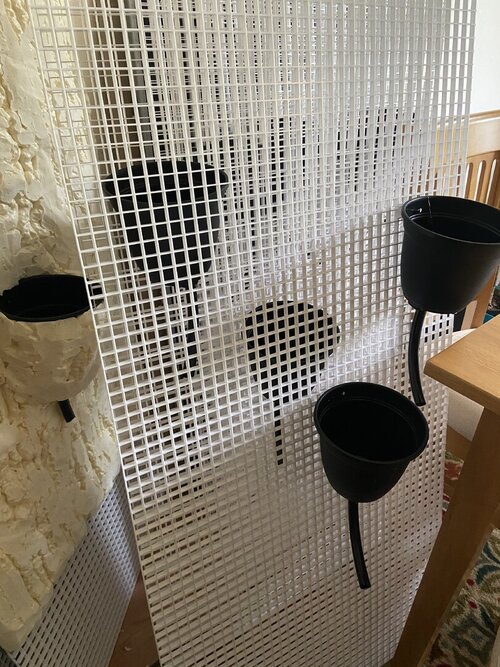
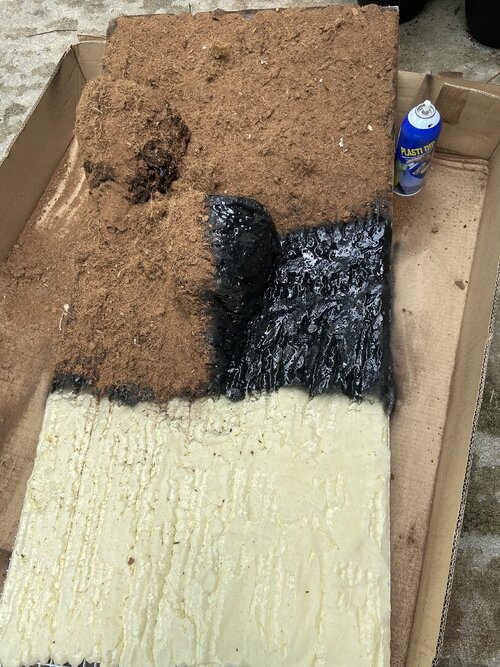
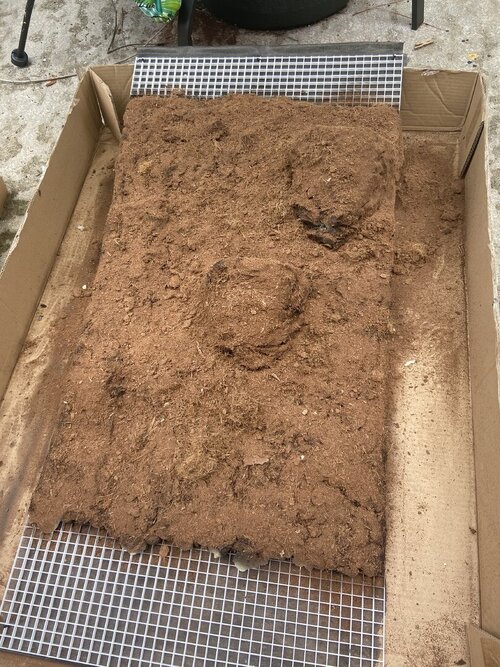
I used plastic lighting egg crate panels when I did mine. Attached my plant pots (I use the 2 pot method) with a tube to keep the drain clear and then spray foamed. Carved it all down the way I wanted, covered with plastic-dip and then coco coir. Instead of plasti-dip, you can use 100% silicone. I just can’t stand that odor. If you use Plastic-dip, it dries fast so you have to work in small sections. I liked my foamed background, but they did reduce a few inches of space in the enclosure and they were very dark. I’ve since removed them and just have a light sky blue shower curtain to block views and contain water spray.
IMG_2237.jpeg IMG_2243.jpeg
IMG_2242.jpeg IMG_1272.jpeg
 
I used plastic lighting egg crate panels when I did mine. Attached my plant pots (I use the 2 pot method) with a tube to keep the drain clear and then spray foamed. Carved it all down the way I wanted, covered with plastic-dip and then coco coir. Instead of plasti-dip, you can use 100% silicone. I just can’t stand that odor. If you use Plastic-dip, it dries fast so you have to work in small sections. I liked my foamed background, but they did reduce a few inches of space in the enclosure and they were very dark. I’ve since removed them and just have a light sky blue shower curtain to block views and contain water spray.
View attachment 357916View attachment 357918
View attachment 357919View attachment 357920
I’ve used plasti dip on my car lol I actually have a bunch left. And yeah I’m only doing the back wall so I’m not too concerned about losing space. I’m just weighing which option I want to go. Does your Cham climb on the walls at all? Wouldn’t the plasti dip rip since it’s like latex? That is a good idea though with the egg crate and spray foam, I’m wondering if I can get the same effect from 3/4” insulation board. I wanna make it sort of like a tree trunk I think and paint it accordingly with tinted drylock and sand for texture. But yours looks really great I love it! Thanks for the quick reply!
 
I’ve used plasti dip on my car lol I actually have a bunch left. And yeah I’m only doing the back wall so I’m not too concerned about losing space. I’m just weighing which option I want to go. Does your Cham climb on the walls at all? Wouldn’t the plasti dip rip since it’s like latex? That is a good idea though with the egg crate and spray foam, I’m wondering if I can get the same effect from 3/4” insulation board. I wanna make it sort of like a tree trunk I think and paint it accordingly with tinted drylock and sand for texture. But yours looks really great I love it! Thanks for the quick reply!
I’ve made a basking area for my bearded dragon with styrofoam scraps and spray foam and a background for a leopard gecko. I covered it with grout and I was able to paint it with acrylic craft paints. To seal I sprayed with water based clear paint. You can also add some paint to the grout if you want. Very messy job and gloves are a must.
My chams did climb the foam and it did hold up pretty well. The basking spot for the beardie held up very well (until I tripped over it while it was out). I didn’t anticipate the leopard gecko being able to cause any damage, but he has. I should have gone heavier with the grout.
Interesting ok great thanks for the feedback! I may use the foam board and use plastidip to coat then paint on top possibly. Not sure yet still as I just decided to add a background.
 
Old thread but wondering did you just paint the foam? Or did you do any cutting etc?

I plan to make a background for mine. I’m making a bioactive out of reptibreeze xl. I made a bottom it’s attaching to out of pvc board and a glass bottom with a drain. I just need a background for just the back side I’m thinking. I have dragon ledges installed too which would be easy to reconnect to a diy background. Just wondering your process I like the outcome.

Although I will probably use sand for texture in the paint. Also did you use anything to waterproof it?
Apologies on my late reply I took a break from forums for a bit. I’m glad my thread had some activity.

I did do some cutting and trimming. All sides were sealed with mod podge and painted with nontoxic paint. I then did another layer mod podge and attached coco choir to it.

In the two years since I made them I would make some changes in the process if/when I make more. The tape/plastic wrap to protect the screen was a good idea, but it allows the foam to lift as it cures so there were gaps on the back of the background, any wandering crickets will def find their way to the back chirp chirp chirp till one day they stop. I love the idea from @MissSkittles using the plastic light grid, that would give it good strength and a flat back. Another option would be to use a sheet of foam cut to size and you can easily add spray foam to it and carve as desired. Thats what I do for my exo terra terrariums.

To seal the foam I would probably paint first and then use silicone which would also be a better glue for the coco coir. The mod podge did not hold the coco very well.

The next obstacle I ran into was how to attach the background to the screen. Since my backgrounds were cut short about 8 inches from the bottom I needed to have a way to attach the backgrounds to the sides of the cage and hold it in place. I used 1.25” magnets with heavy duty double sided tape, but since my backgrounds weren’t completely flat, they kept pulling off and not holding onto the foam. Next time instead of double-sided tape, I will use silicone and make sure that my backs are flat so there’s no resistance. you want to make sure if you use magnets that you use magnets that are strong enough to hold at least about 5 pounds. I used 8 magnets per section (four attached to the foam and 4 on the outside of the cage, connecting to the other magnets. Each cage required 24 magnets (three background sections per cage).

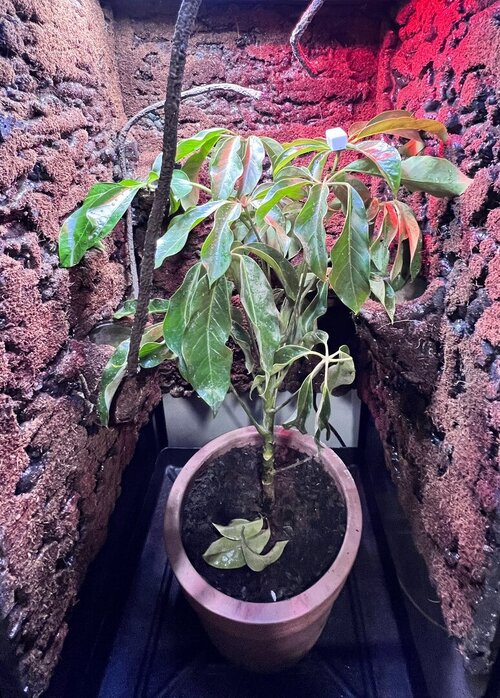
Here pics I took recently of the cages. I’m still pleased by how they turned out.
 

Attachments

  • IMG_4351.jpeg
    IMG_4351.jpeg
    282.6 KB · Views: 11
  • IMG_4352.jpeg
    IMG_4352.jpeg
    333.5 KB · Views: 11
Back
Top Bottom