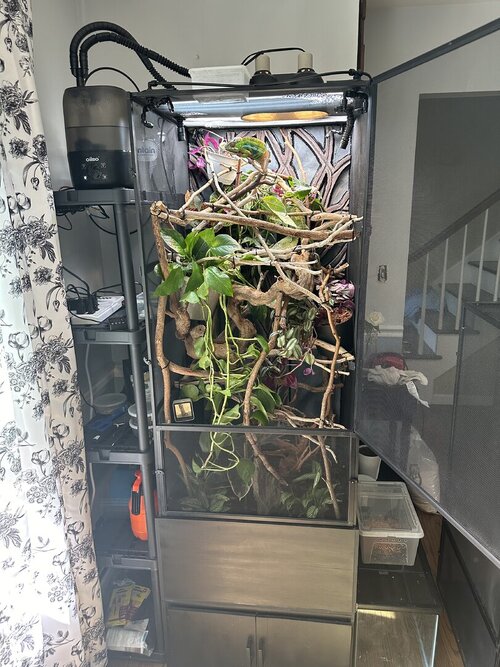
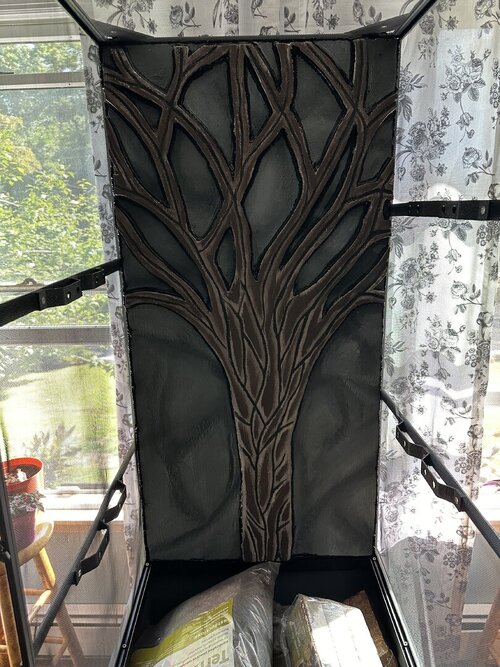
My foam background for Reptibreeze XL

Apologies on my late reply I took a break from forums for a bit. I’m glad my thread had some activity.

I did do some cutting and trimming. All sides were sealed with mod podge and painted with nontoxic paint. I then did another layer mod podge and attached coco choir to it.

In the two years since I made them I would make some changes in the process if/when I make more. The tape/plastic wrap to protect the screen was a good idea, but it allows the foam to lift as it cures so there were gaps on the back of the background, any wandering crickets will def find their way to the back chirp chirp chirp till one day they stop. I love the idea from @MissSkittles using the plastic light grid, that would give it good strength and a flat back. Another option would be to use a sheet of foam cut to size and you can easily add spray foam to it and carve as desired. Thats what I do for my exo terra terrariums.

To seal the foam I would probably paint first and then use silicone which would also be a better glue for the coco coir. The mod podge did not hold the coco very well.

The next obstacle I ran into was how to attach the background to the screen. Since my backgrounds were cut short about 8 inches from the bottom I needed to have a way to attach the backgrounds to the sides of the cage and hold it in place. I used 1.25” magnets with heavy duty double sided tape, but since my backgrounds weren’t completely flat, they kept pulling off and not holding onto the foam. Next time instead of double-sided tape, I will use silicone and make sure that my backs are flat so there’s no resistance. you want to make sure if you use magnets that you use magnets that are strong enough to hold at least about 5 pounds. I used 8 magnets per section (four attached to the foam and 4 on the outside of the cage, connecting to the other magnets. Each cage required 24 magnets (three background sections per cage).

Here pics I took recently of the cages. I’m still pleased by how they turned out.
Yea they look great! I ended up making one out of foam insulation board coated with drylok then painted and attached it to the back of enclosure using black silicone. I only did the back and it worked really good. Although you can only see the top portion of it now after the branches and plants were added haha. Here’s the background and after everything was added.
 

Attachments

  • IMG_3978.jpeg
    IMG_3978.jpeg
    231 KB · Views: 1
  • IMG_3854.jpeg
    IMG_3854.jpeg
    257.6 KB · Views: 1
Yea they look great! I ended up making one out of foam insulation board coated with drylok then painted and attached it to the back of enclosure using black silicone. I only did the back and it worked really good. Although you can only see the top portion of it now after the branches and plants were added haha. Here’s the background and after everything was added

Apologies on my late reply I took a break from forums for a bit. I’m glad my thread had some activity.

I did do some cutting and trimming. All sides were sealed with mod podge and painted with nontoxic paint. I then did another layer mod podge and attached coco choir to it.

In the two years since I made them I would make some changes in the process if/when I make more. The tape/plastic wrap to protect the screen was a good idea, but it allows the foam to lift as it cures so there were gaps on the back of the background, any wandering crickets will def find their way to the back chirp chirp chirp till one day they stop. I love the idea from @MissSkittles using the plastic light grid, that would give it good strength and a flat back. Another option would be to use a sheet of foam cut to size and you can easily add spray foam to it and carve as desired. Thats what I do for my exo terra terrariums.

To seal the foam I would probably paint first and then use silicone which would also be a better glue for the coco coir. The mod podge did not hold the coco very well.

The next obstacle I ran into was how to attach the background to the screen. Since my backgrounds were cut short about 8 inches from the bottom I needed to have a way to attach the backgrounds to the sides of the cage and hold it in place. I used 1.25” magnets with heavy duty double sided tape, but since my backgrounds weren’t completely flat, they kept pulling off and not holding onto the foam. Next time instead of double-sided tape, I will use silicone and make sure that my backs are flat so there’s no resistance. you want to make sure if you use magnets that you use magnets that are strong enough to hold at least about 5 pounds. I used 8 magnets per section (four attached to the foam and 4 on the outside of the cage, connecting to the other magnets. Each cage required 24 magnets (three background sections per cage).

Here pics I took recently of the cages. I’m still pleased by how they turned out.
But it works to protect the wall and keep in some humidity and heat.
 
Yea they look great! I ended up making one out of foam insulation board coated with drylok then painted and attached it to the back of enclosure using black silicone. I only did the back and it worked really good. Although you can only see the top portion of it now after the branches and plants were added haha. Here’s the background and after everything was added.
Love that tree look.
 
Back
Top Bottom