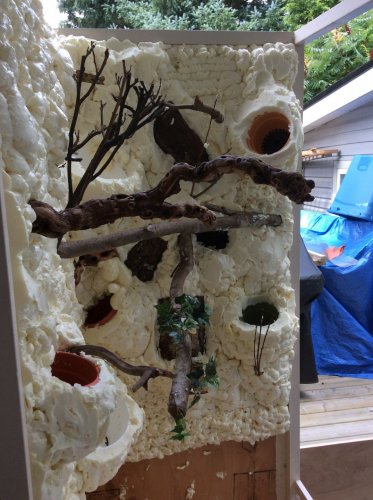
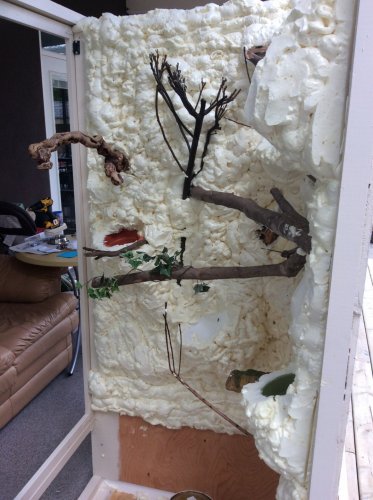
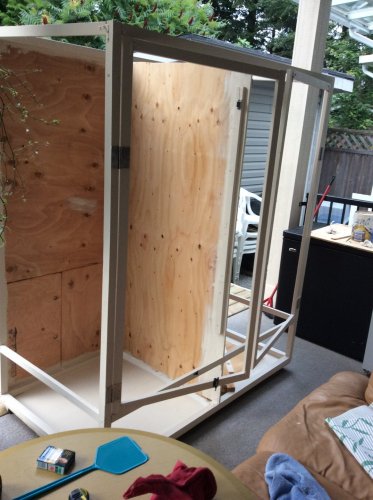
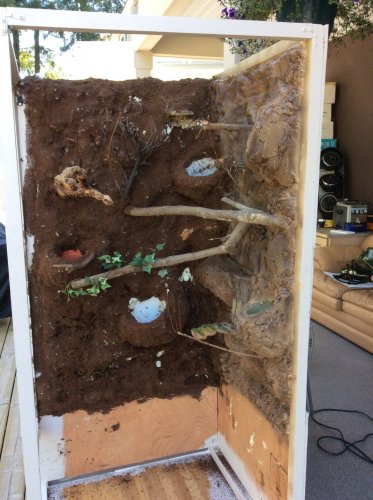
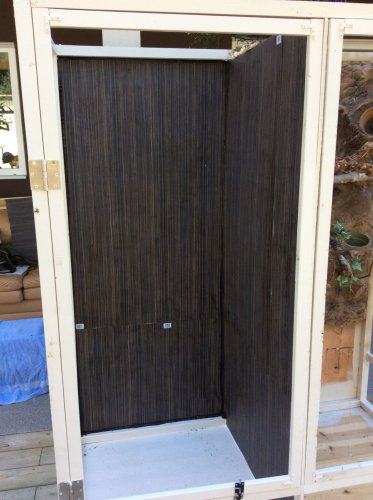
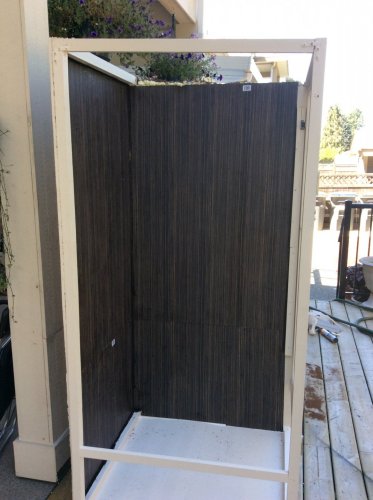
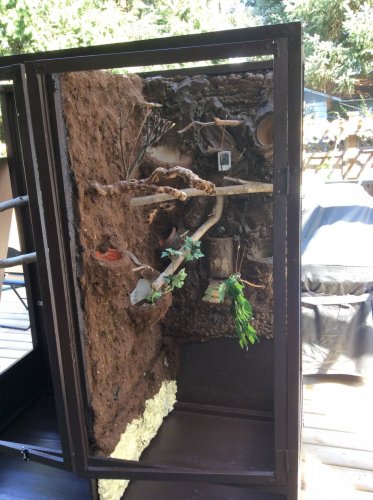
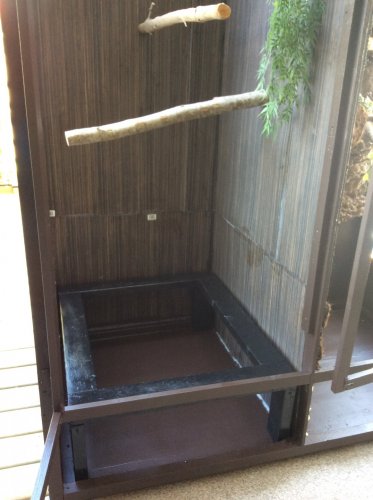
Custom 5ftx2.5x6ft enclosure

Started this project 3 days ago, today is the 4th day. ( this will be complete in 2-3 weeks )
Framing coated 3 times, used 2x2, 2x1 and ply woods. ( Divided into two enclosure )
Spray foam today for one side and going silicone and lay Eco earth.
Wanted to post this to see what you guys think before I do the Eco earth :D
If any need trim, just let me know :) would greatly appreciated, thank you in advance

Used 9 cans of great stuff.
 

Attachments

  • image.jpg
    image.jpg
    290.8 KB · Views: 327
  • image.jpg
    image.jpg
    261.1 KB · Views: 330
Looking great.

Curious if there is drainage for the planters?
i made a big dumb mistake and forgot drainage when I built the frame and didn't raise it up so I have room underneath the enclosure now the only thing I can think of is find a plastic bin same size as the enclosure and put a tall plant inside. After I would still small hole on bottom of bin and use a tubing to drain water from inside to outside the enclosure... ( like making a dripper but instead of drips, it's draining )

If you have any tips or ideas, I would love it !
 
Yes, i meant the pot drainage... is it just going to drain in behind the spray foam?
For ones that are on side planted, will drill hole on sides so it just drains to the bottom, the plants im using will mostly be pothos.

If anything I will trim foam away on the bottom of the pots to clear way or make a pathway for water to drip downwards into the bin that will be placed on bottom.

If you have a way or something better, would appreciated it. This is my first large enclosure and have very limited info except ones I see here.
 
I have no ideas for the side wall pot drainage.. I was just curios as I will be making an enclosure shortly and I really like the textured sides...
 
Tested the potted plants drainage, drilled holes for drips to fall downwards and it works.

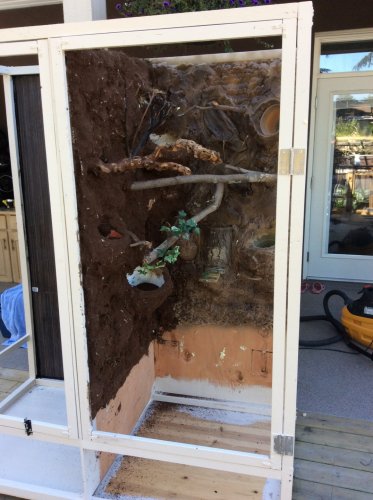
Here picture after test, silicone and dirt for the side. Will do back side tommorow after the side dries.
image.jpeg
 
Update

Decided to just spray texture on back side and this side of enclosure will be for my wc Fischer since he needs high humidity. ( just need some touch up and another layer of texture)

Other side i used laminate for background for my adult veiled.

Next up is the drainage and touch up
 

Attachments

  • image.jpeg
    image.jpeg
    263.3 KB · Views: 247
ok so is that like coconut husk or? on the sides..I'm doing the same thing but bought coconut bricks. You have to wet them for expansion, been waiting 4 days so far for it to dry because it says you cant lay it on wet...wondering if I did something wrong or?
 
I feel this will be a learning experience. If you have a misting system, i have to replace my sticks every 2-3 years because they rot out. If 2 crickets fall deeply in love with each other and really like that stucco wall, its going to be GG.

Last time i did something like this, yes i shaped everything and texurized everything, but i put like a million layers of outdoor paint on it to seal it up.
I figured that,Naomi screw the wood branches on outside and can be easily replace If anything. Also its not stucco, it's foam and coated with waterproof, colour, texture and again water resistant sealer clear coat.
 
ok so is that like coconut husk or? on the sides..I'm doing the same thing but bought coconut bricks. You have to wet them for expansion, been waiting 4 days so far for it to dry because it says you cant lay it on wet...wondering if I did something wrong or?
I would recommend completely dry coconut or it will not stick properly.

I used Eco earth and some moss, once it was completely dry ( I left it drying for 3 days) after it dries, I coat it with clear water resistant first before I spray foam on the plywood so mold doesn't happen and after i let the foam dried, I sprayed plastic coating and silicone the soils.

Tested today with misting on the background and so far i have no problem. No dirt falls and drips downwards.
Also a way you can work with it, is let your coconut dry in the sun spread out.
 
Update

Finish with coatings, sealants, 3D background, drainage table, and 0.5x8" board that will be on top to cover light fixtures.

One more weekend and it's complete :)
Sadly only had couple hours to work on this weekend due to holidays.
All that's left is buy Hi-Core(R) Corrugated Sheet - 48" x 96" - White for bottom and drills some holes. Add door handles and bottom cabinets and finally the screens.
Once complete I'll bring it inside and put one tall plants for each, fake plants and vines.

Haven't decided if I'm going cover the side for my Fischer to be completely closed up with top and door with screen only but worry wouldn't be enough air going through but seen people do it.. Anyone got ideas if I should and what should I use that can be remove easily if anything?

Wanting to order the 48" tropic quad from Todd (lightyourreptile) but not in stock till pretty much end of August so I'm waiting.
would the chameleons benefit more if I get 2 24 inch quad or would it be same with 48 inch because each side is 2.5 ft wide so there still be short a little for full coverage in length. I'm hoping one fixture would be enough and two basking fixtures since I rather keep it simple and just have 3 cords for lights and 1 for mist system.

As for mist system how and what would I need if I get the regular mist king starter kit and try divide the spray for two enclosure. What I wanted was two sprays for the veiled side and 3 for the Fischer side ( including rain spray ). Would the motor be strong enough to handle that many spray attachments ?
 

Attachments

  • image.jpg
    image.jpg
    208.4 KB · Views: 203
  • image.jpeg
    image.jpeg
    296.8 KB · Views: 176
  • image.jpeg
    image.jpeg
    203 KB · Views: 190
Back
Top Bottom